Building a Custom Feedback Form in Frappe
Feedback is the lifeblood of client relationships. Whether it's post-meeting reflections, product satisfaction surveys, or service reviews, capturing what your clients truly think helps
The Problem
When I first got the task to collect client feedback, I thought I'd just make a simple web form to capture the data and move on. But then reality hit me—having to manually track feedback, match it with meeting dates later, and keep everything organized? That sounded like a nightmare waiting to happen.
Before diving into building something from scratch, I checked if Frappe had a built-in feedback solution I could use out of the box. The answer was no (at least at the time of writing this blog).
So let me walk you through how I solved this minor but important issue.
1. Creating the Feedback DocType
To get started, I created a new Feedback DocType.
Instead of detailing every field (that would take forever), here's the field breakdown with their types—you can adapt this to your own needs:
| Field | Type | Purpose |
|---|---|---|
| Client | Link | Connects feedback to a client/user |
| Name1 | Data | Stores the person's name |
| How did you find the meeting experience overall? | Select | Rating option |
| Did you feel engaged during the meeting? | Select | Engagement rating |
| What would make these meetings more effective in the future? | Text | Open feedback |
| How satisfied were you with the meeting? | Rating | Numeric satisfaction score |
2. Setting Up Naming Convention
Next, I configured the naming convention to make feedback entries easy to track. This lets us see both who submitted feedback and when they submitted it at a glance.
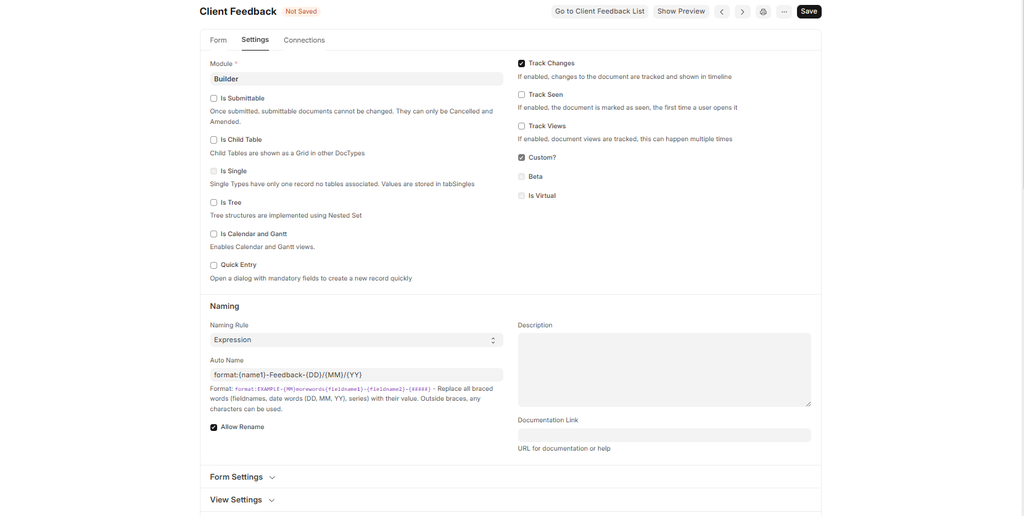
In the Naming section:
- Naming Rule: Select "Expression"
- Auto Name: Use a format like
"{name1}-Feedback-{DD}/{MM}/{YY}"
Feel free to customize this naming pattern to suit your needs. The power is in your hands!
⚠️ Important Note: The label you see on the form might not match the actual field name saved in the backend. Always verify the exact field names before using them in scripts. Also, the system is case and space sensitive!
3. Creating the Web Form
Now let's create the actual web form that users will interact with:
- Search for "Web Form" in the Frappe search bar
- Create a new web form and select your Feedback DocType
- Add your route (e.g.,
/feedback) - Click "Get Fields" to populate the form with your DocType fields
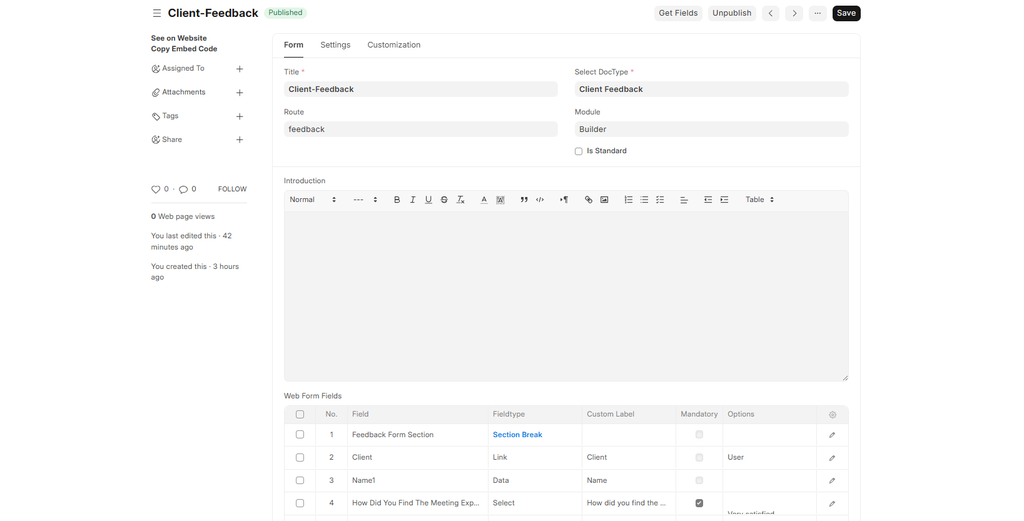
You can choose to hide certain fields to control exactly what users see and fill out. This gives you flexibility while keeping the user experience clean.
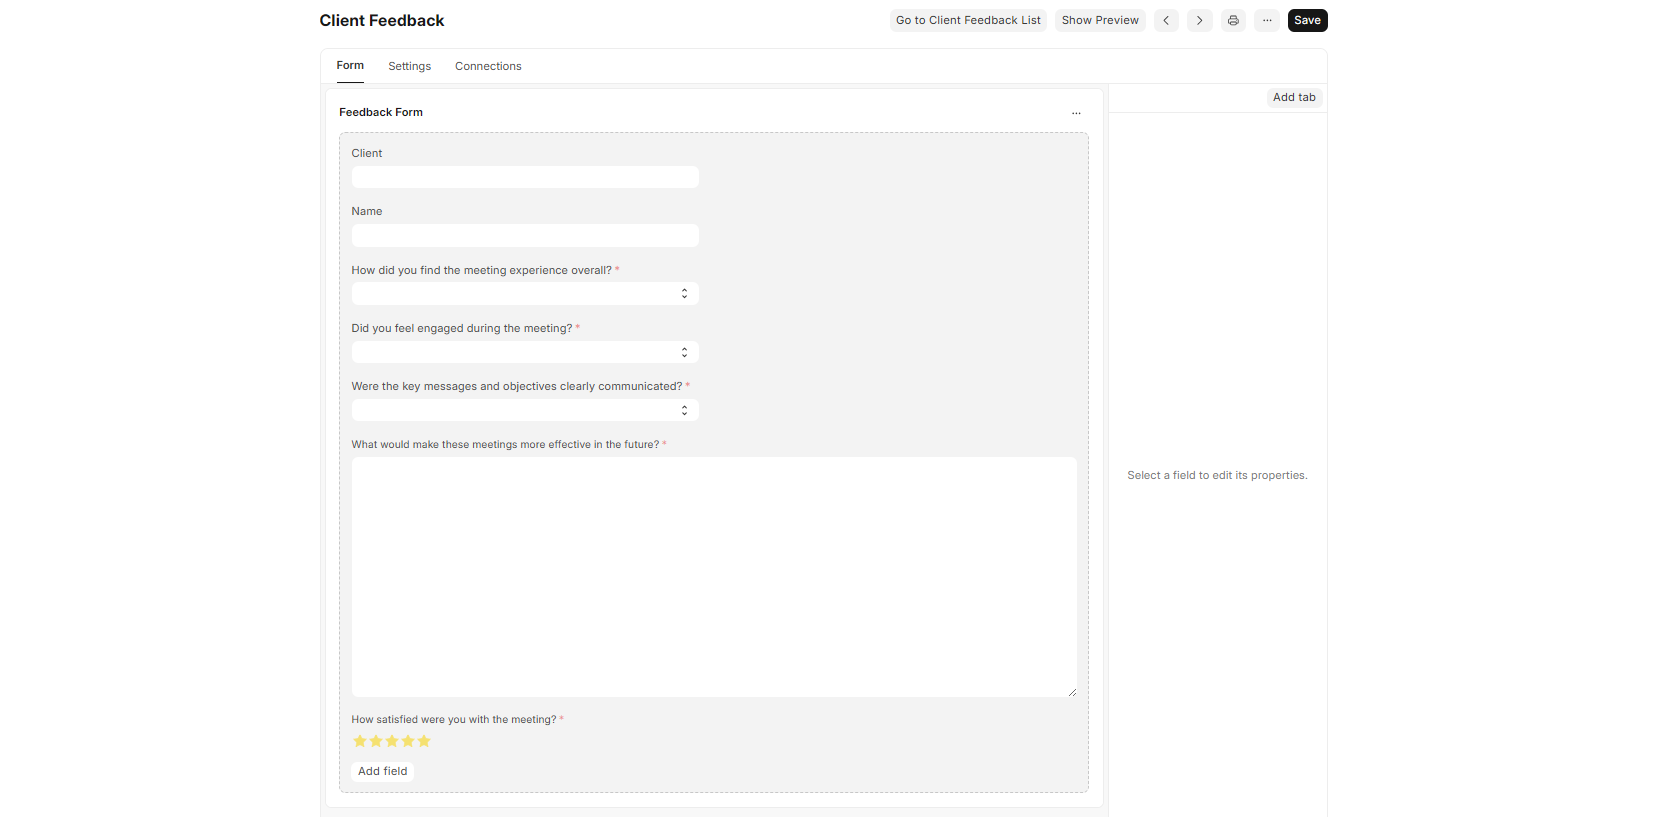
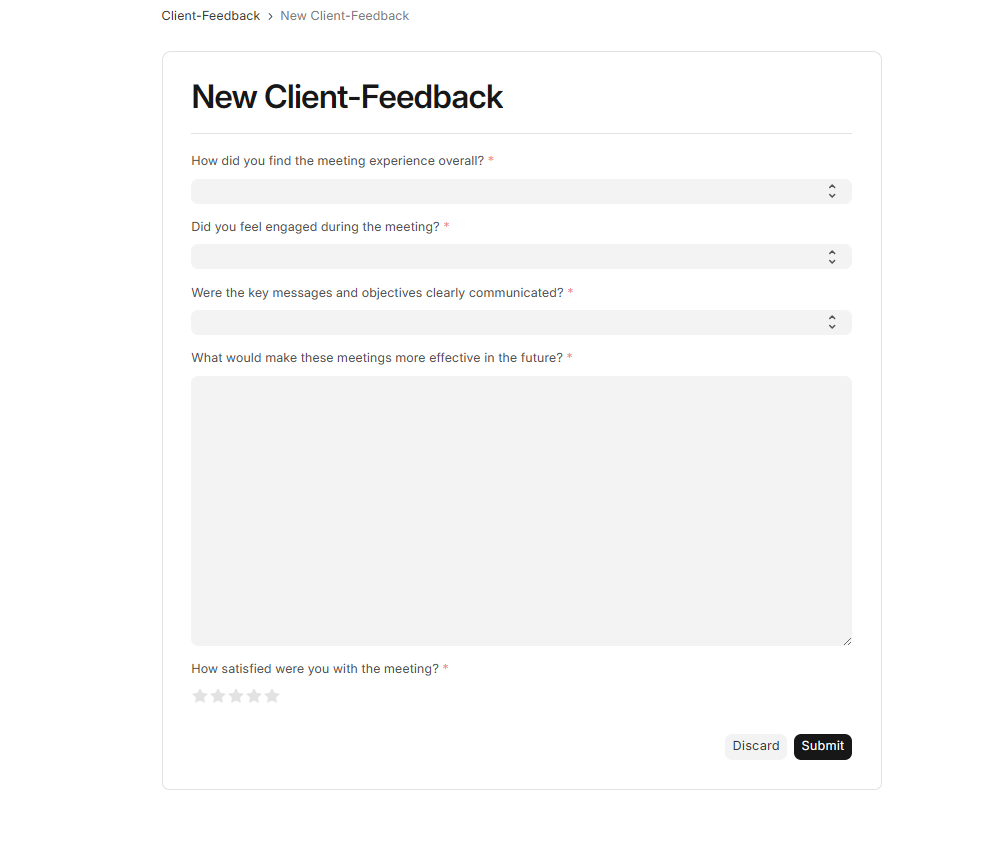
Here's what the final form looks like to users:
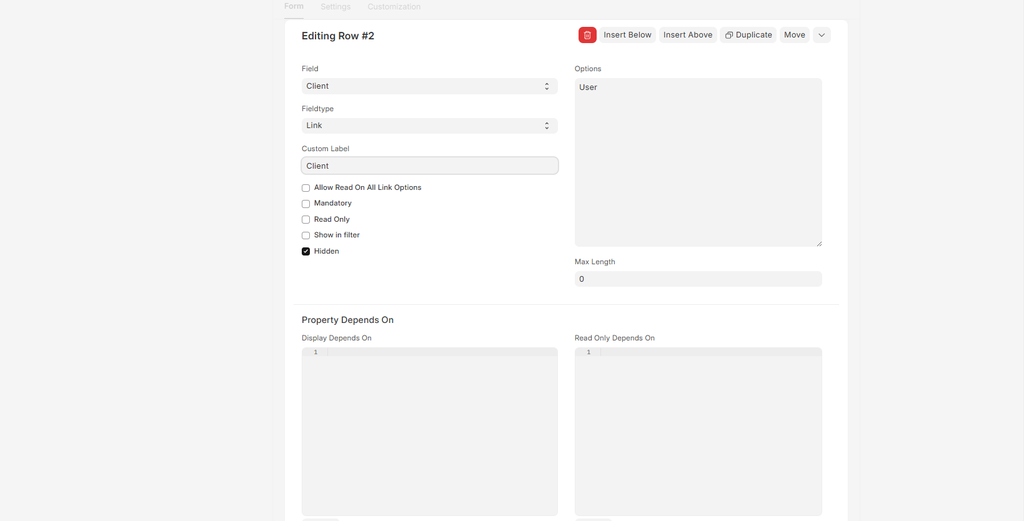
4. Auto-Populating User Information
We want to automatically capture who is submitting the feedback without making users type their name or email again. We'll use a Server Script to handle this.
4.1 Enable Server Scripting
If server scripting isn't enabled yet, you'll need to run this command (or ask your admin to):
bench set-config -g server_script_enabled 1Refresh your site, then search for "Server Script" to create a new one.
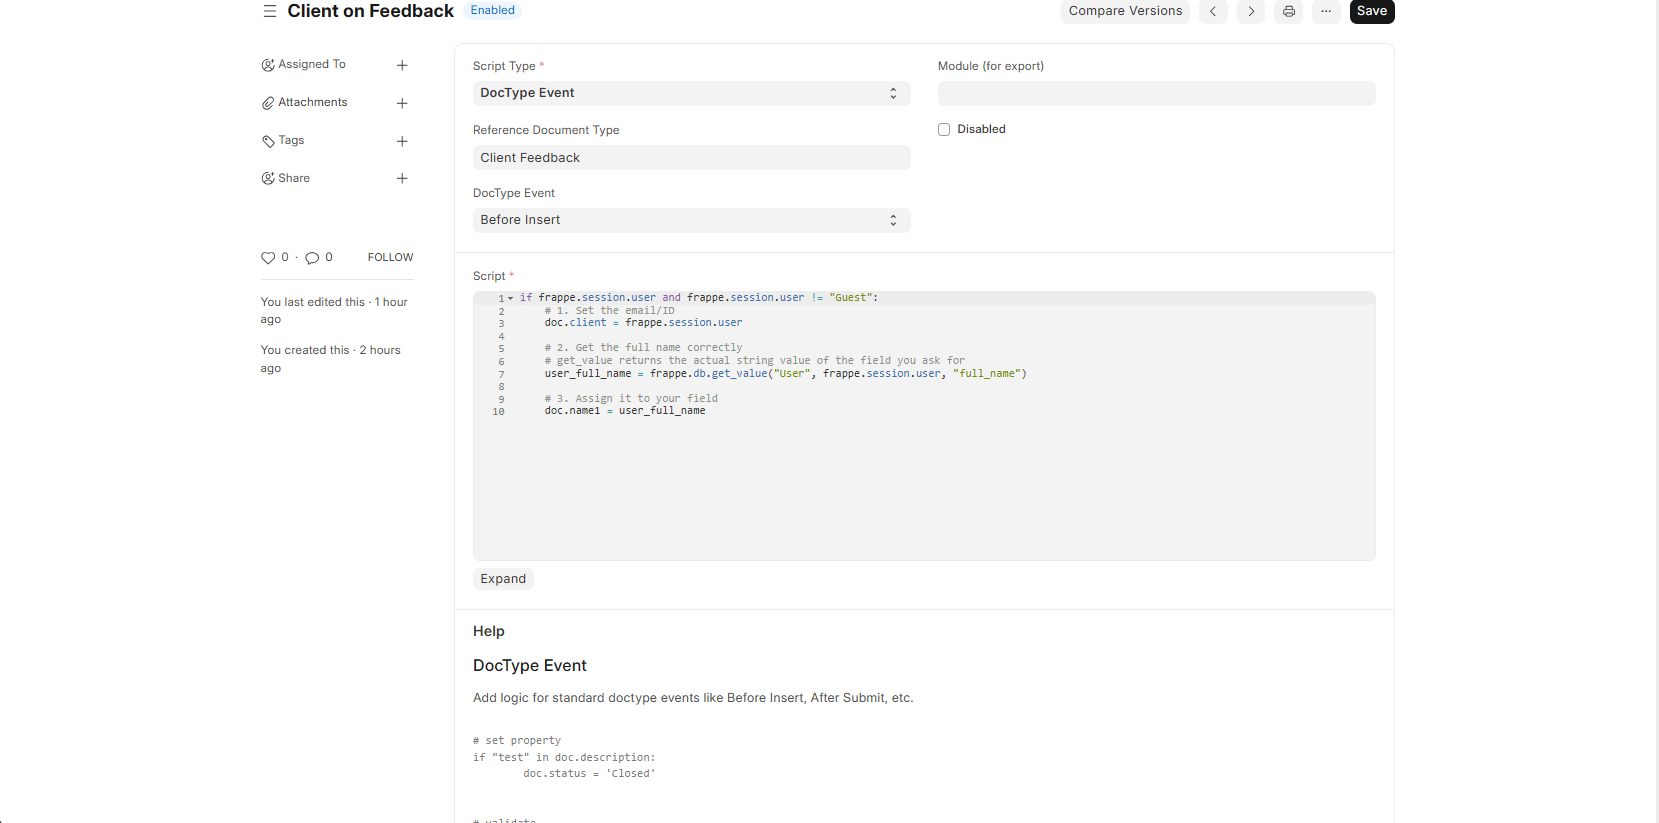
4.2 The Script
Here's the server script that automatically populates the client and name fields:
if frappe.session.user and frappe.session.user != "Guest":
    # 1. Set the email/ID as the client
    doc.client = frappe.session.user

    # 2. Get the full name from the User record
    user_full_name = frappe.db.get_value("User", frappe.session.user, "full_name")

    # 3. Assign it to your name field
    doc.name1 = user_full_name
How it works:
- Checks if a user is logged in (not a guest)
- Grabs the user's email from the session
- Looks up the full name associated with that user
- Populates the feedback fields automatically
4.3 Server Script Configuration
- Select your DocType: Feedback (or whatever you named yours)
- Event: Set to "Before Insert" (runs before data is saved to the database)
5. Web Form Settings
Now configure your web form settings:

- Enable "Login Required" — this ensures only authenticated users can submit feedback
- Select "Show List" in list settings — this prevents redirection after submission
- Check "Allow Multiple Responses" — lets users submit feedback multiple times (for different meetings)
💡 Pro Tip: I had an issue where after submitting one feedback form, I was redirected somewhere else when trying to create another. Enabling "Show List" and "Allow Multiple Responses" fixed this perfectly.
The system will automatically prevent duplicate submissions from the same user based on your field constraints.
6. Permissions (Optional)
If you're concerned about who can view the feedback list, you can add DocType permissions to restrict access. This ensures only authorized team members can see the submitted feedback data.
7. What's Next?
If everything is set up correctly, you now have a clean way to capture feedback from logged-in users (both internal team members and clients).
Future enhancements to consider:
- Adding feedback categories for better filtering
- Creating dashboards to visualize feedback trends
- Setting up email notifications when feedback is submitted
- Adding conditional fields based on satisfaction ratings
While this solution focuses on authenticated users, the same pattern can be adapted for public forms with slight modifications. The core concept is reusable across many scenarios—just customize the fields to match your data collection needs.
Quick Reference - Terminal Commands
# Enable server scripting
bench set-config -g server_script_enabled 1

# Clear cache after changes (if needed)
bench clear-cache

# Migrate after DocType changes
bench migrate
Final Thoughts
This approach saved me from the manual headache of tracking feedback against meeting dates. Now everything is automatically timestamped, linked to users, and searchable within Frappe.
Happy coding!
No comments yet. Login to start a new discussion Start a new discussion