Customizing CRM Deals
Customizing CRM Deal Status in Frappe: Align Your Pipeline with Your Business
Every business manages its sales pipeline differently. Some use simple stages like "Prospecting" and "Closed Won," while others need more granular steps like "Needs Analysis," "Proposal Sent," or "Contract Negotiation." If your CRM's default deal statuses don't match your sales process, you're not stuck with them. Frappe CRM is fully customizable, and in this guide, we'll show you exactly how to tailor deal statuses to fit your unique workflow.
In this article we'll cover:
- Accessing the CRM Deal Status doctype
- Adding, editing, and removing deal statuses
- Understanding the cache and refresh requirements
- Best practices for designing your sales pipeline
1. Prerequisites – What You'll Need
Before diving into customization, ensure you have:
| Requirement | Description |
|---|---|
| Frappe CRM Installed | The CRM app must be installed on your bench site |
| Administrator or System Manager Access | You need sufficient permissions to modify DocTypes |
| Understanding of Your Sales Pipeline | A clear idea of the stages your deals go through |
2. Finding the CRM Deal Status Doctype
The "Deal Status" options in Frappe CRM are stored as a standard DocType. To customize it, we'll use the search bar—the quickest navigation tool in Frappe.
- Log in to your Frappe site as an Administrator or System Manager.
- Look at the top-right corner of the screen for the search bar (also known as the Awesome Bar).
- Type
CRM Deal Statusand press Enter.
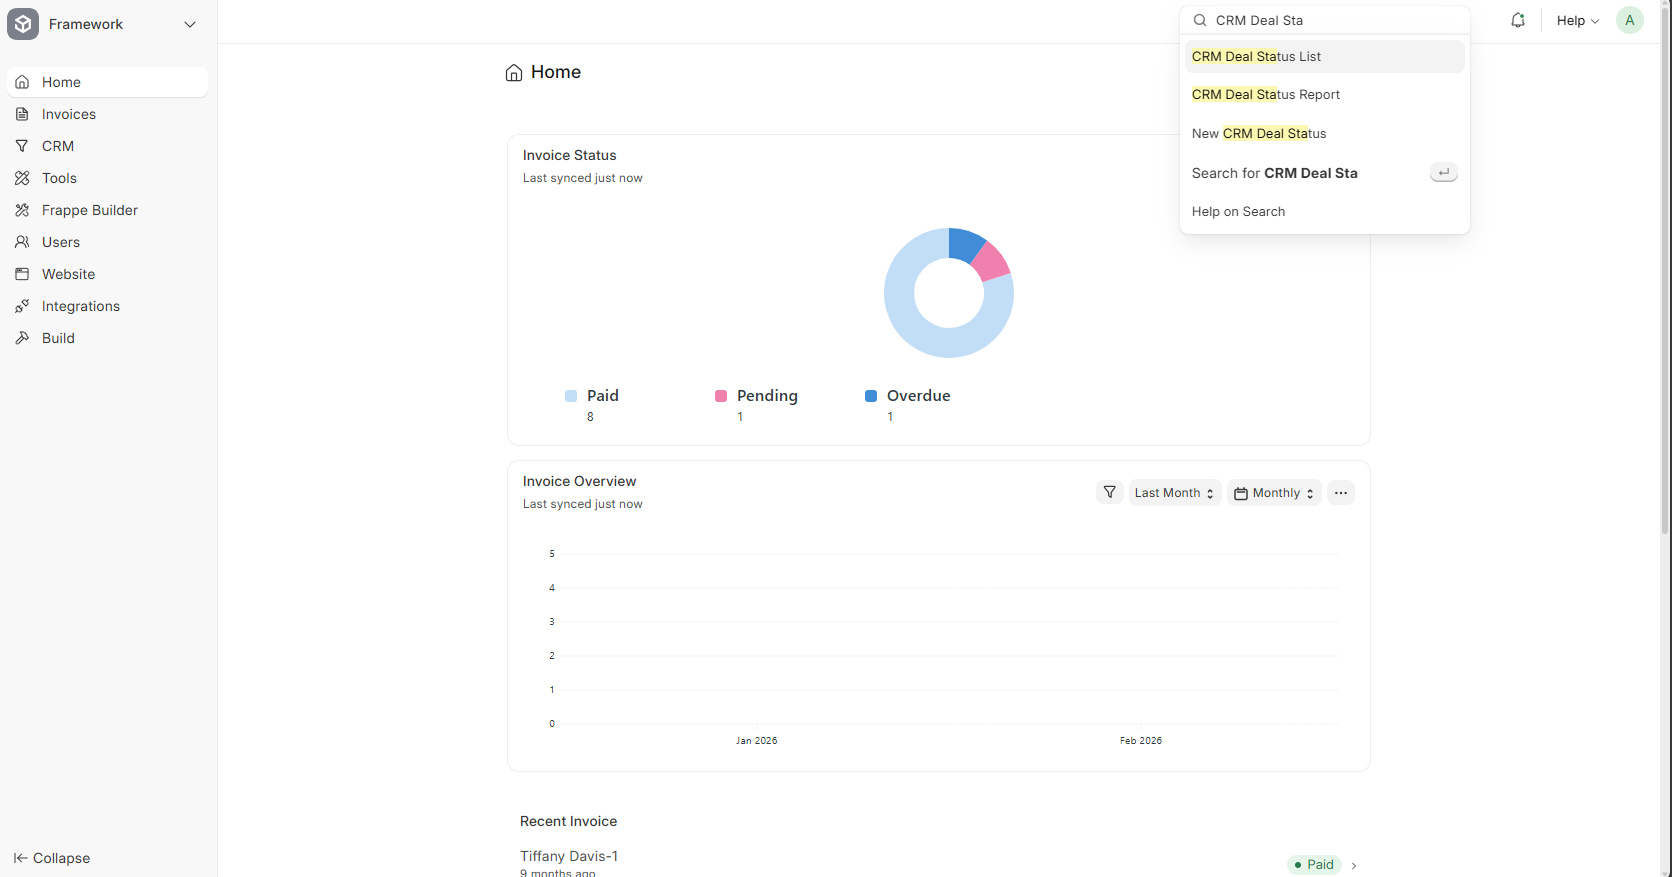
Note: You don't need to type the entire phrase—Frappe's fuzzy search will find "CRM Deal Status" as you type. It should appear in the dropdown before you finish typing.
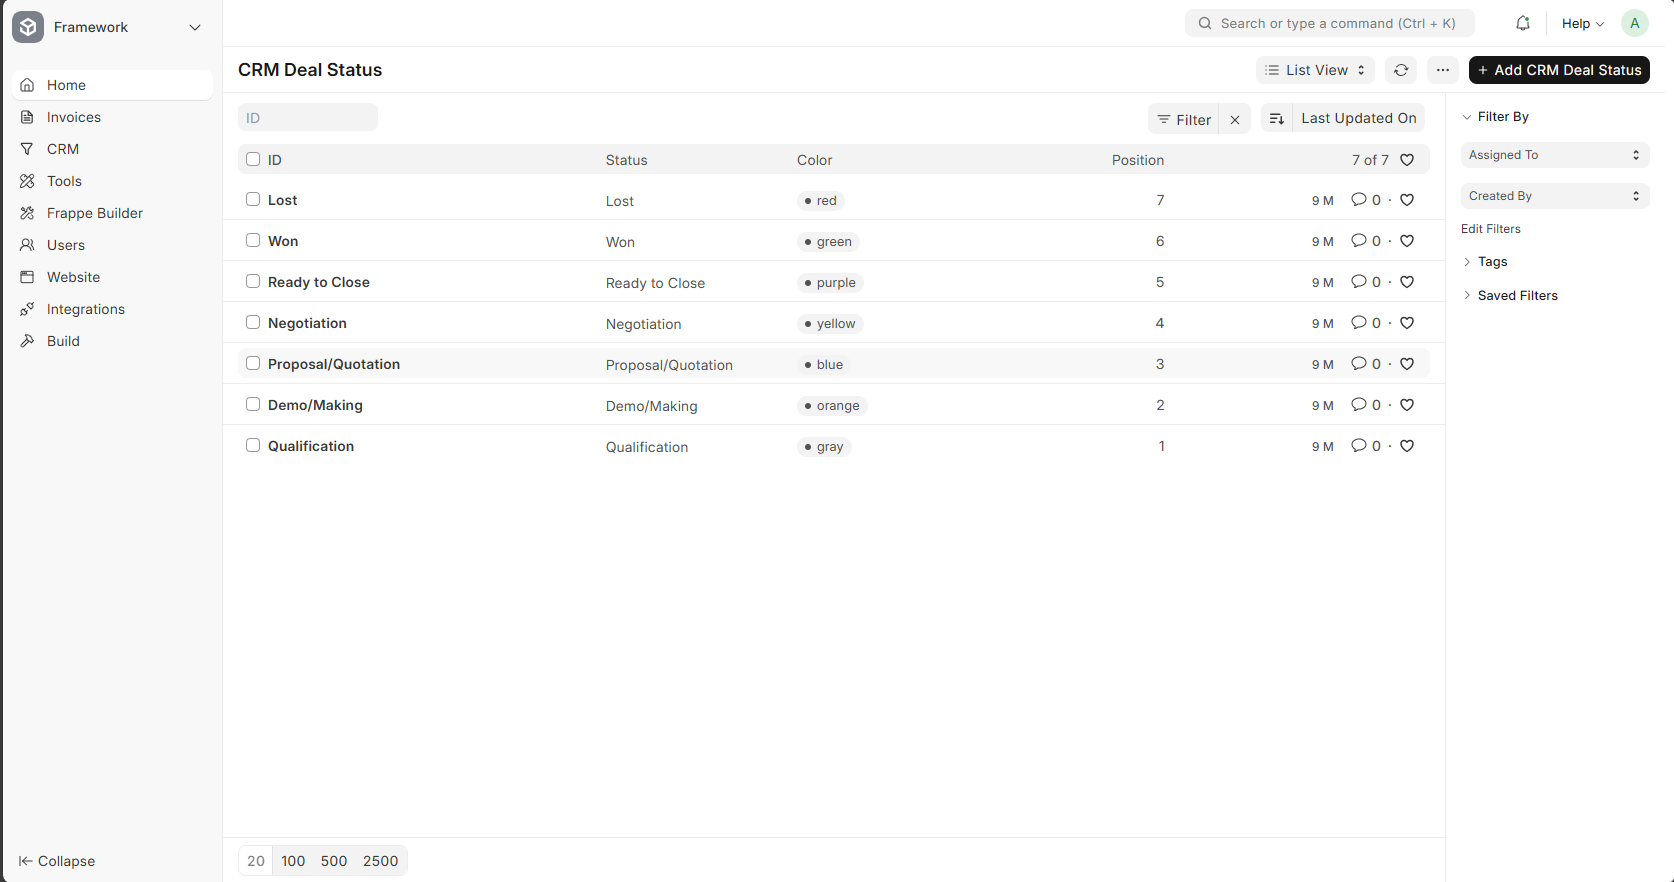
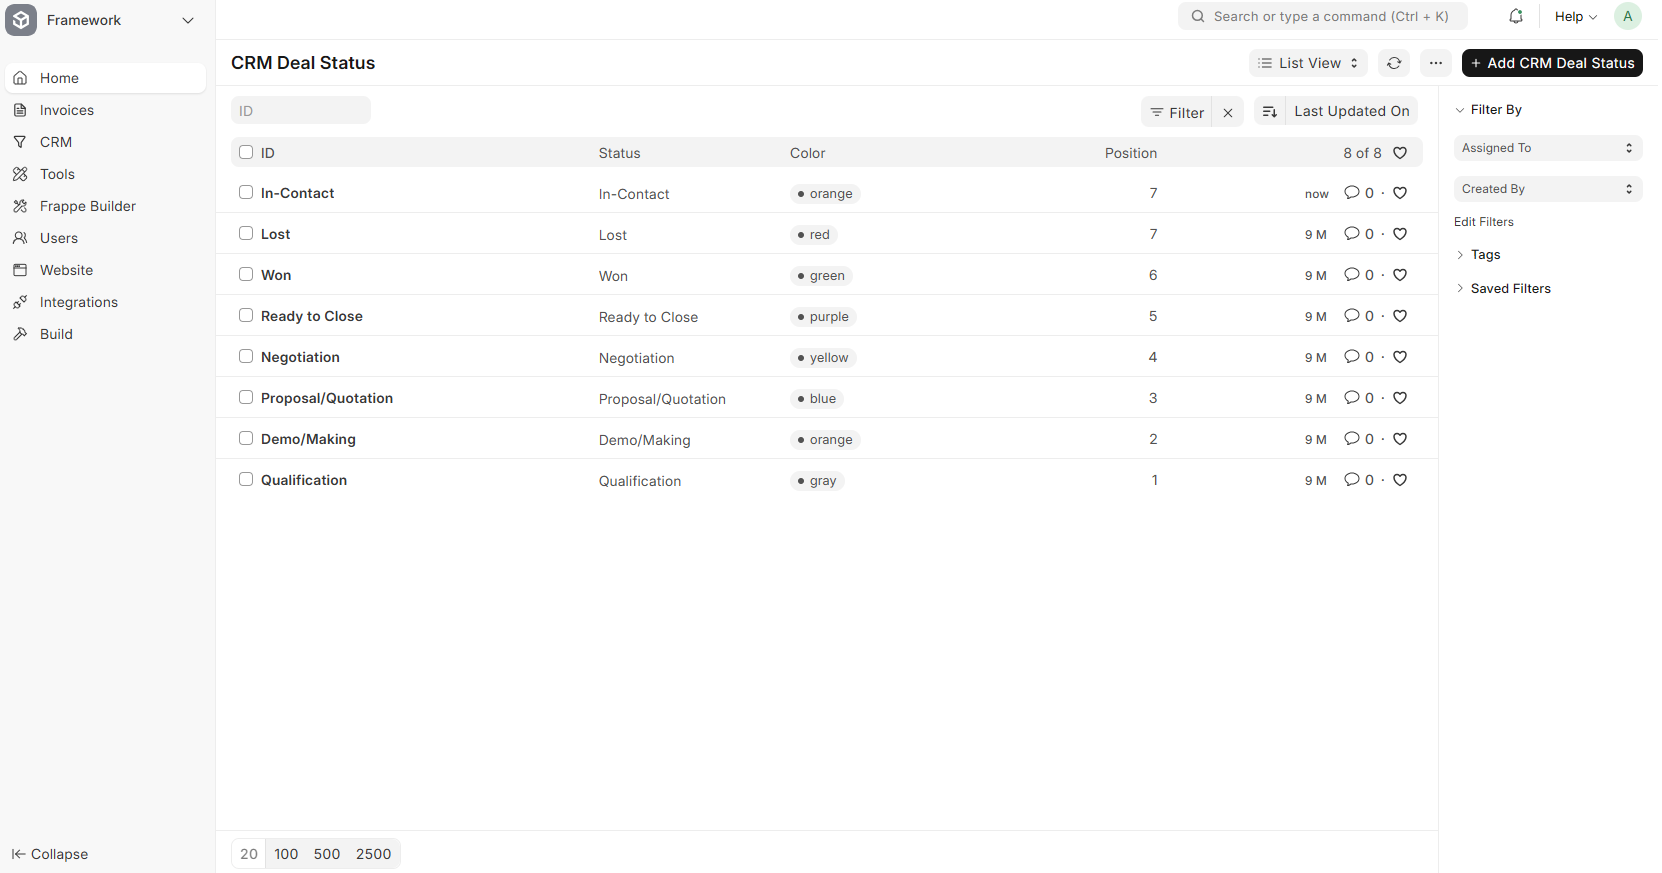
Once selected, you'll be taken to the CRM Deal Status List View, where all existing deal statuses are displayed.
3. Customizing Your Deal Statuses
Now that you're in the list view, you have complete control over your deal statuses. You can add new ones, edit existing names, or start completely fresh.
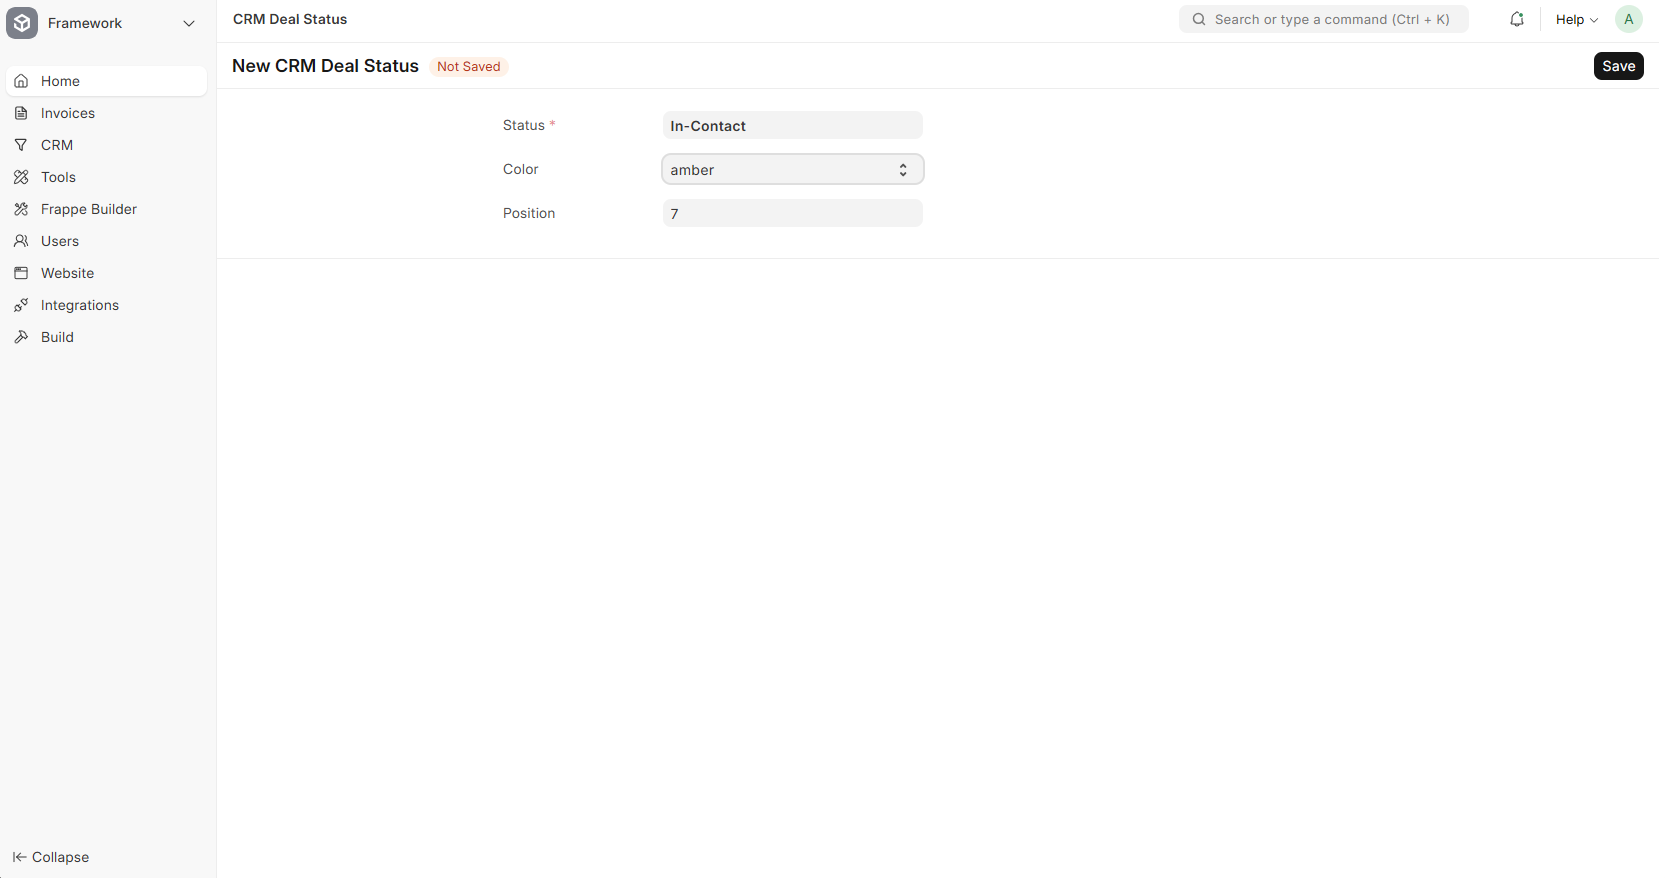
3.1 Adding a New Deal Status
- Click the "+ Add CRM Deal Status" button in the top-right corner.
- In the popup, enter:
- Title: The name of your status (e.g., "Discovery Call Completed")
- Status Color: Choose a color that helps visually identify this stage
- Click "Save".
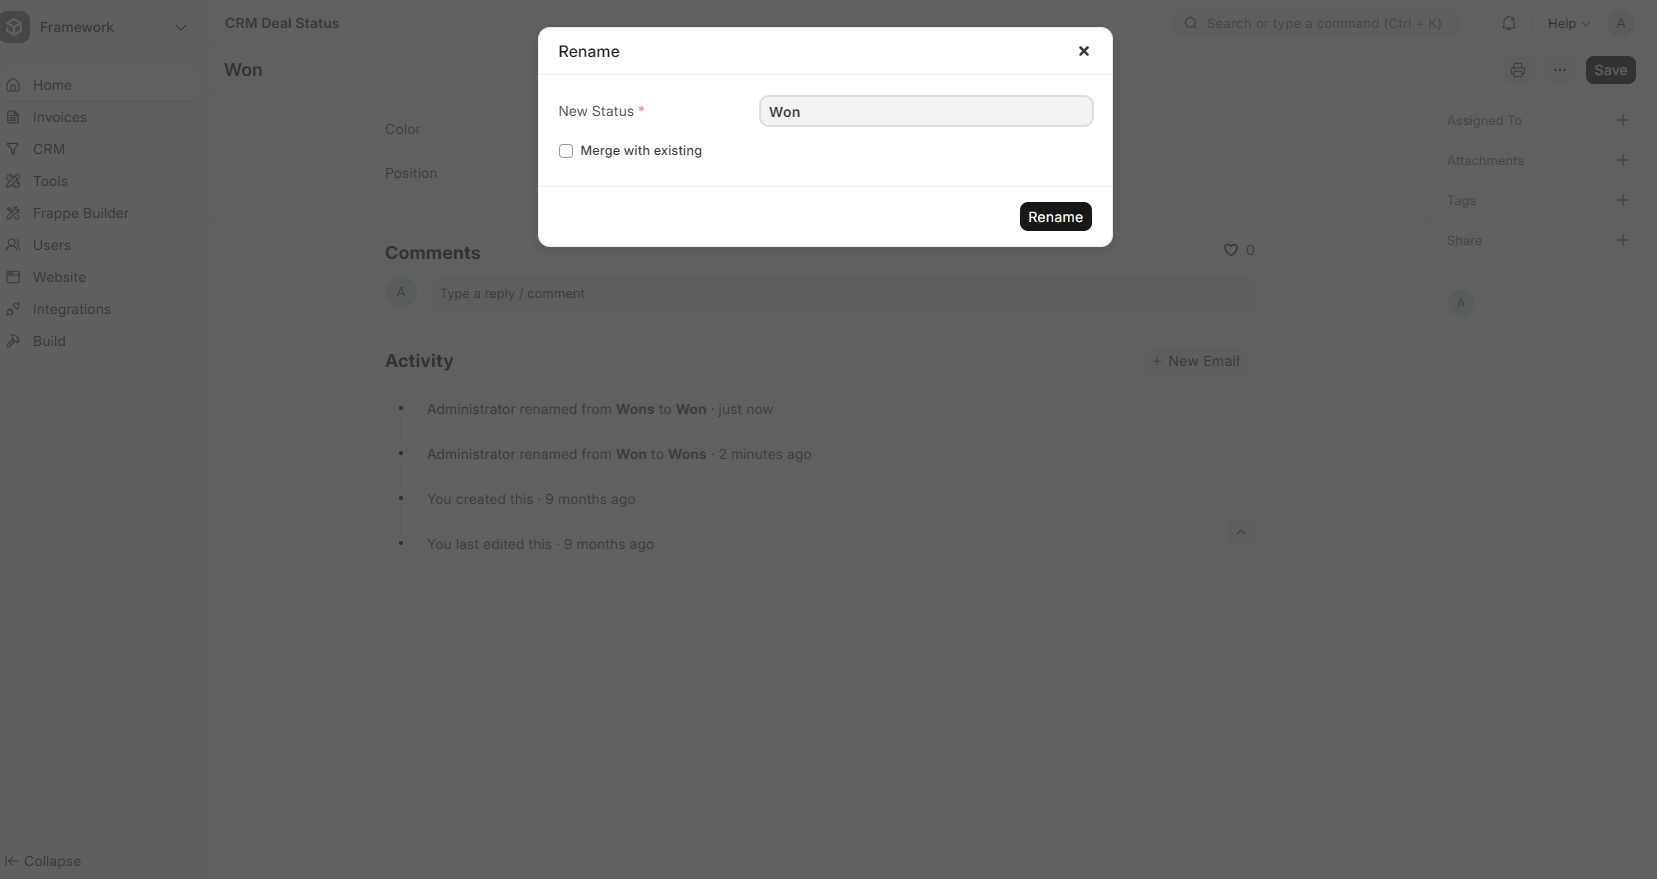
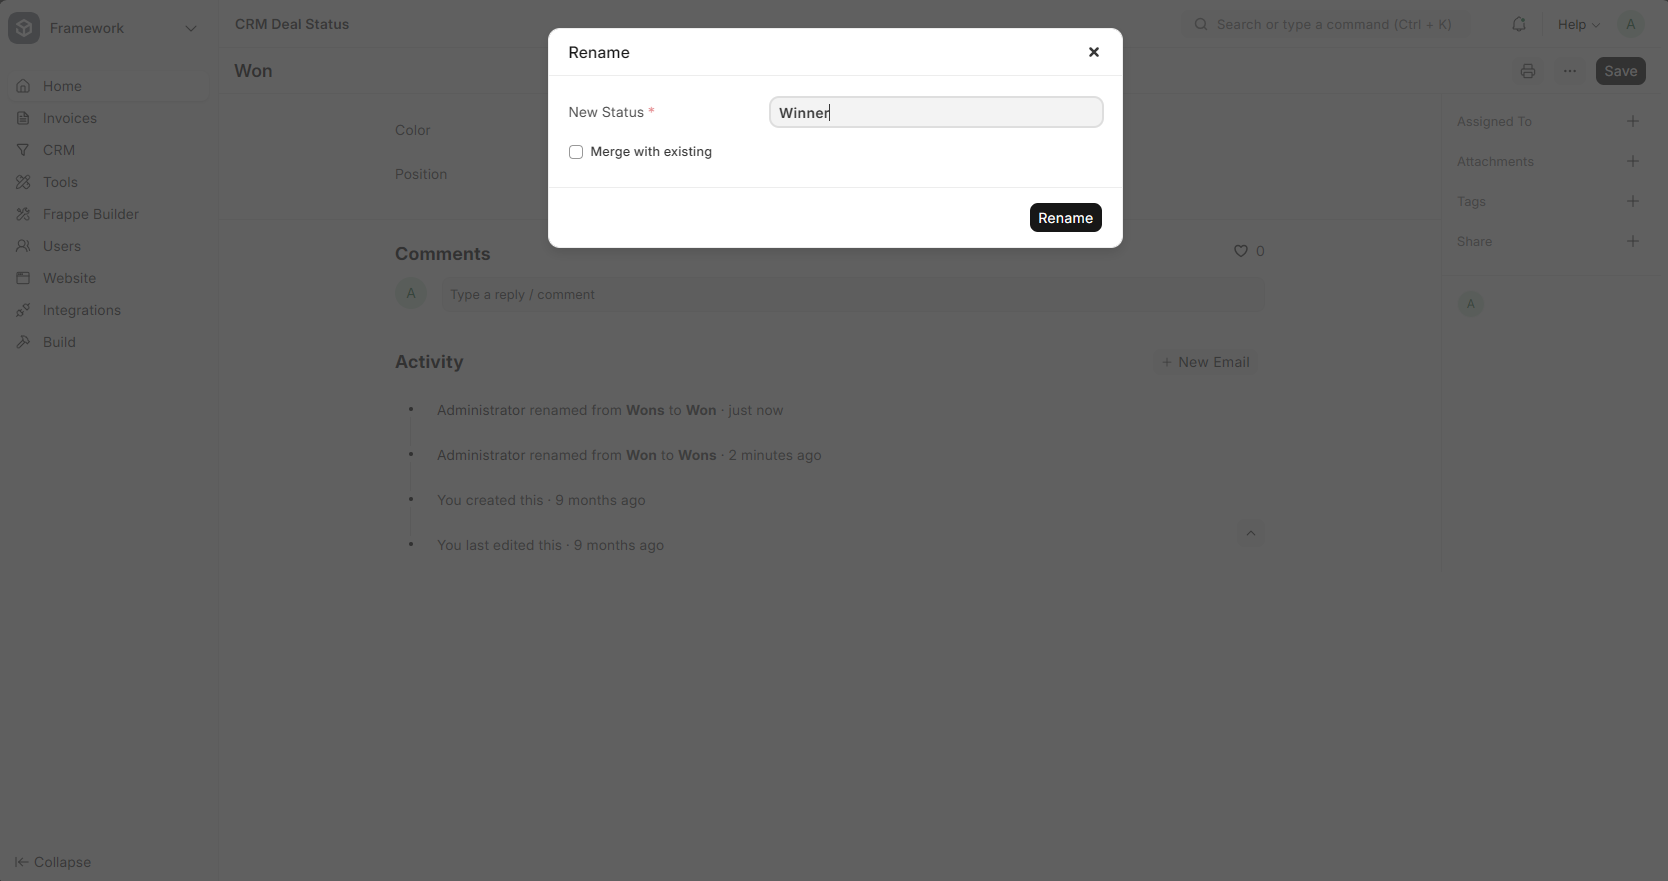
3.2 Editing an Existing Status
- In the list view, click on the name of the status you want to modify.
- You'll be taken to the detail view. Edit the Title or Color as needed.
- Click "Save".
- Return to the list view to verify your changes.
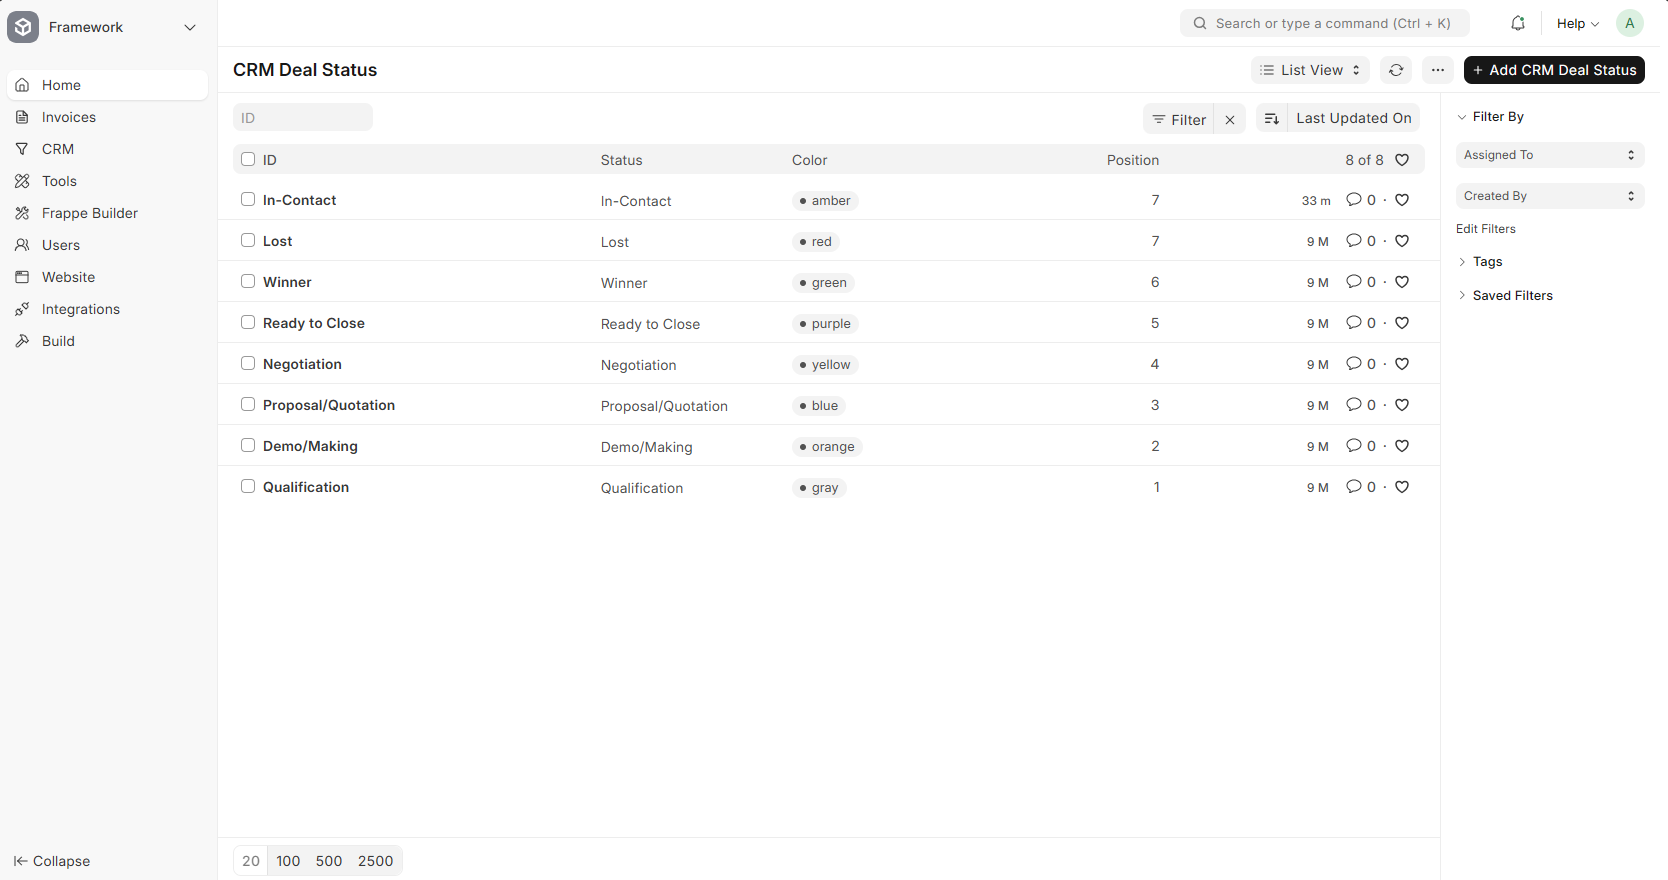
3.3 Starting Fresh – View of All Statuses
Here's a complete view of all deal statuses in the system before customization:
4. The Critical Step: Refreshing Your Changes
Here's something many users miss—and it's essential for your changes to appear correctly.
After adding, editing, or deleting statuses, you must:
- Reload the page (F5 or Cmd+R) to clear the browser cache.
- Refresh the Frappe CRM page where you manage your deals.
Why? Frappe caches DocType metadata to improve performance. When you modify a core component like Deal Status, the cache needs to be cleared before the changes propagate throughout the system. Without this step, you might see old status names or encounter unexpected behavior.
Technical Note: Frappe's cache invalidation typically happens automatically, but a manual refresh ensures your browser isn't serving a stale version of the page.
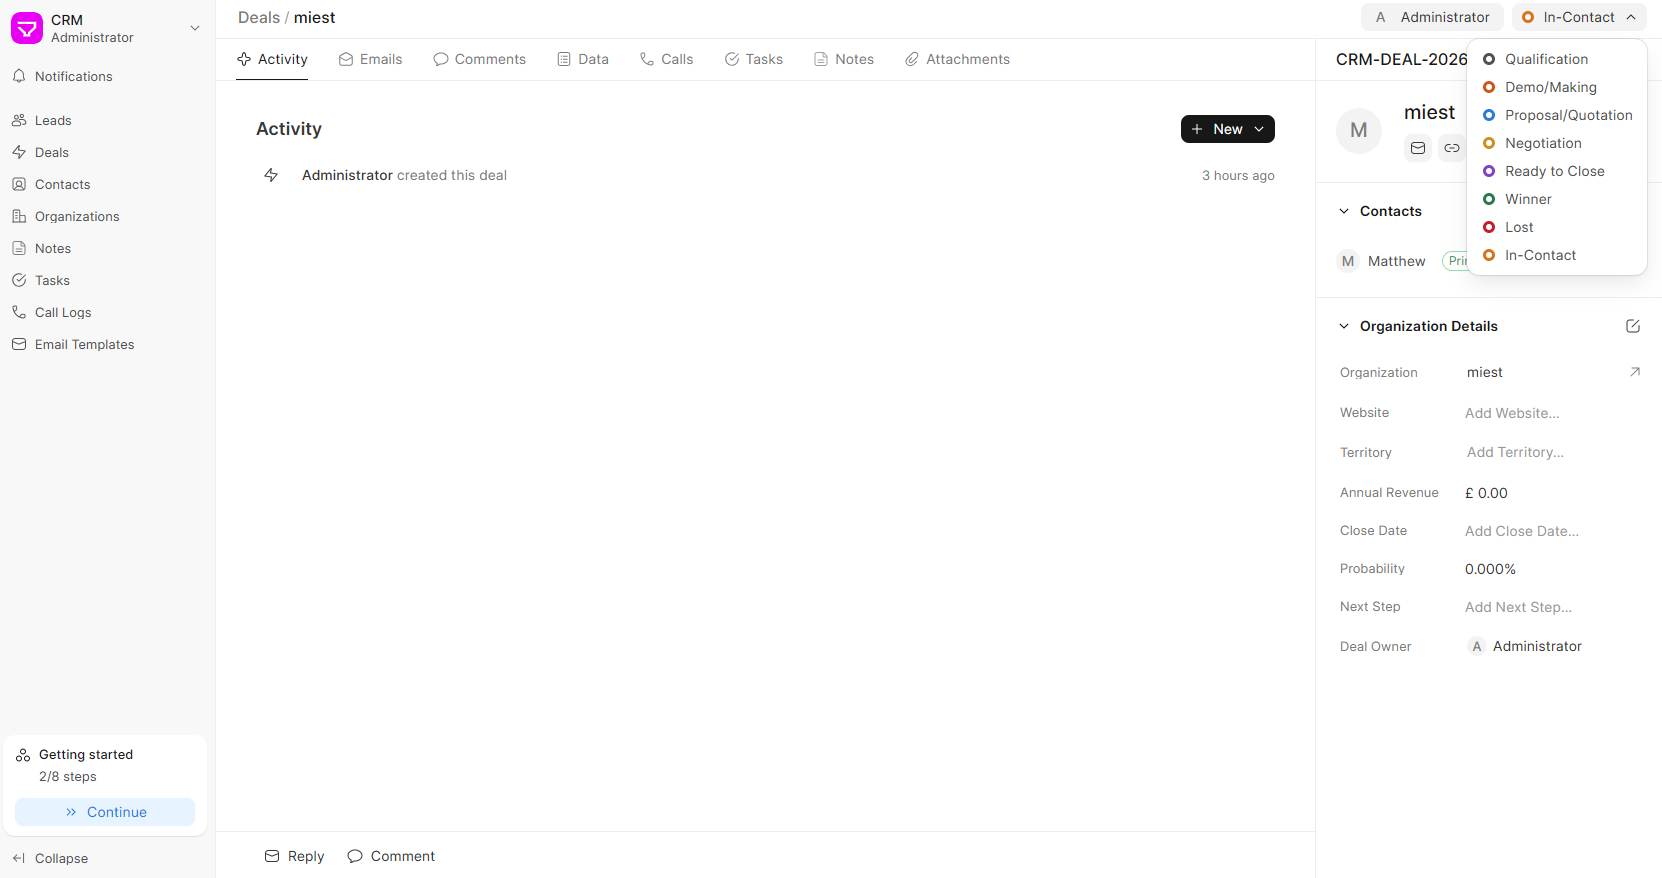
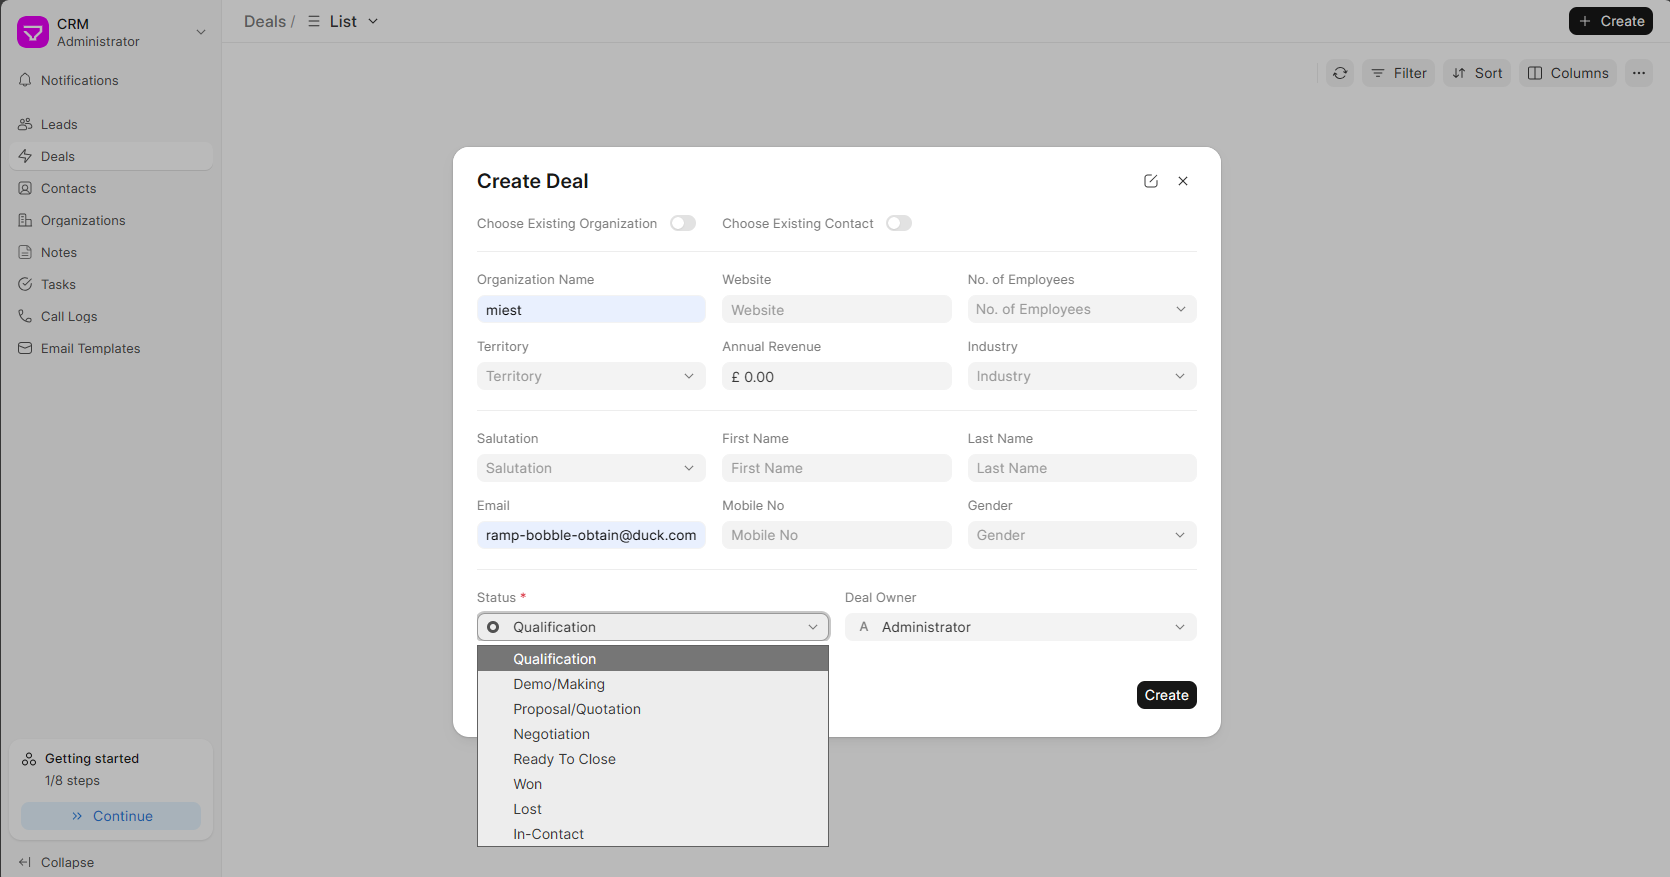
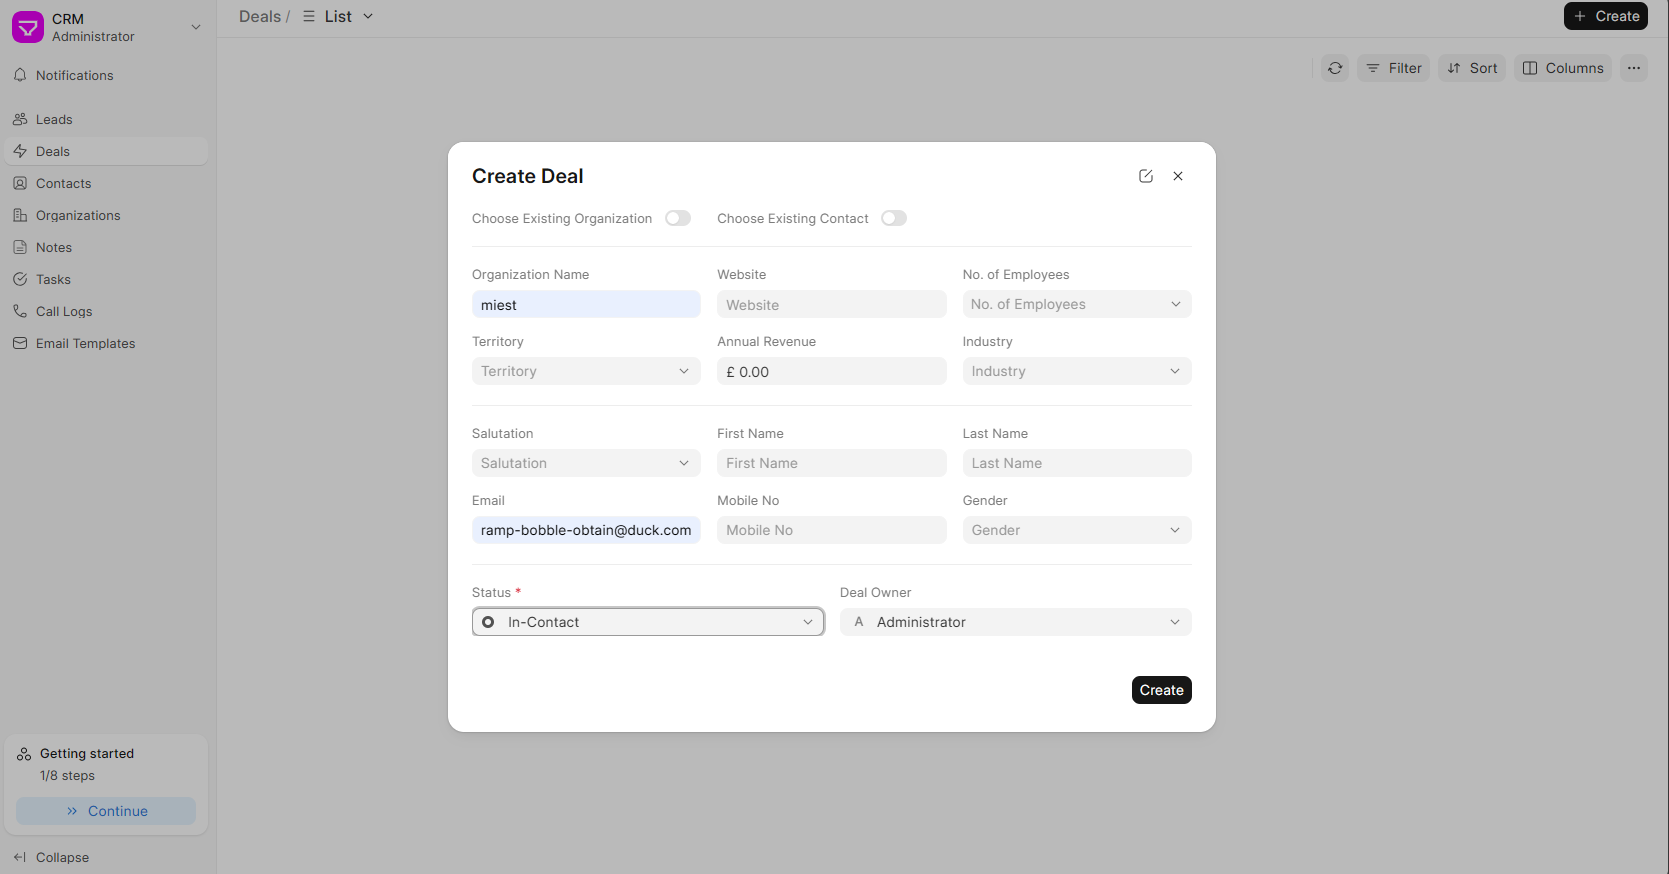
5. Verifying Your Changes in Deals
Once you've customized your statuses and refreshed the page, it's time to see them in action when creating or editing deals.
6. Troubleshooting: Common Issues & Quick Fixes
| Symptom | Likely Cause | Quick Fix |
|---|---|---|
| Changes not appearing in deal dropdown | Cache not cleared | Hard refresh your browser (Ctrl+F5 or Cmd+Shift+R) |
| Can't find "CRM Deal Status" in search | Insufficient permissions | Ensure you're logged in as Administrator or System Manager |
| Error when saving a new status | Missing required fields | Make sure both Title and Color are filled in |
| Old status still appears after deletion | Browser cache | Clear browser cache or open in incognito mode |
7. Best Practices for Designing Your Deal Statuses
Your deal statuses should reflect your actual sales process. Here are some guidelines to consider:
Keep It Simple, But Comprehensive
Too few statuses lack detail; too many create administrative overhead. Aim for 5-7 stages that clearly define your pipeline.
Common Sales Stages to Consider
- Prospecting / Lead Qualification – Initial contact, determining fit
- Needs Analysis – Understanding customer requirements
- Proposal / Quote Sent – Pricing and solution presented
- Negotiation – Discussing terms, revisions, or discounts
- Closed Won – Deal successfully converted
- Closed Lost – Deal didn't move forward
Use Color Strategically
Colors provide visual cues in your pipeline view. Consider:
- 🔵 Blue for active/in-progress stages
- 🟡 Yellow for stages requiring attention
- 🟢 Green for positive outcomes (Closed Won)
- 🔴 Red for negative outcomes (Closed Lost)
8. TL;DR – Quick Reference Guide
# 1. Access the Doctype
Search "CRM Deal Status" in the Awesome Bar

# 2. Add New Status
Click "+ Add CRM Deal Status" → Fill Title & Color → Save

# 3. Edit Existing Status
Click status name → Edit → Save → Return to list view

# 4. Verify Status List
Review all statuses in the Deal Status List

# 5. Refresh to Apply Changes
Reload page (F5) → Refresh CRM deals view

# 6. Test in New Deal
Create a new deal to see your custom statuses in action
Thanks for using Frappe CRM! If you have any questions or need further assistance, please don't hesitate to reach out to our support team.
Happy customizing!
No comments yet. Login to start a new discussion Start a new discussion