Manufacturing in ERPNext
A step-by-step guide from raw materials to finished goods—showing how your entire manufacturing process flows seamlessly in ERPNext.
Manufacturing is at the heart of many businesses. Whether you're building bookshelves, assembling electronics, or producing packaged goods, ERPNext provides a complete manufacturing module to manage the entire production lifecycle. This guide walks through the process using a practical example: manufacturing a bookshelf from raw materials, handling work orders, job cards, stock entries, and finally delivering and invoicing the finished product.
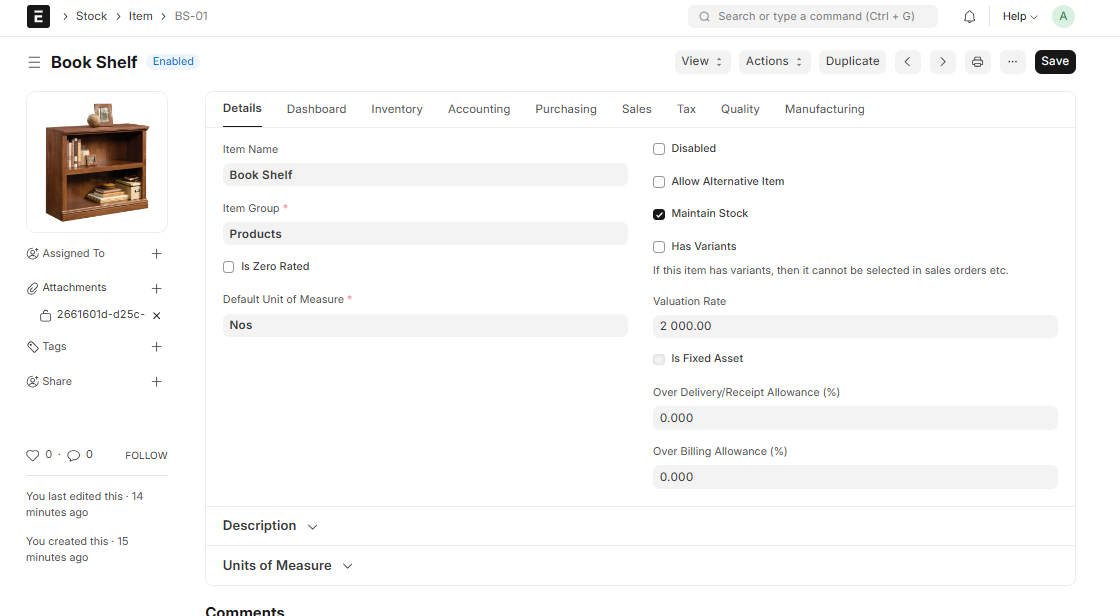
1. Creating the Item to Be Manufactured
The first step is to create the finished product item in ERPNext. In our example, we're manufacturing a Bookshelf. This item will be the final output of our production process.
2. Creating Raw Material Items
Before we can manufacture anything, we need the components. For a bookshelf, raw materials might include wood, screws, varnish, and shelves. Each raw material must be created as an item in ERPNext.
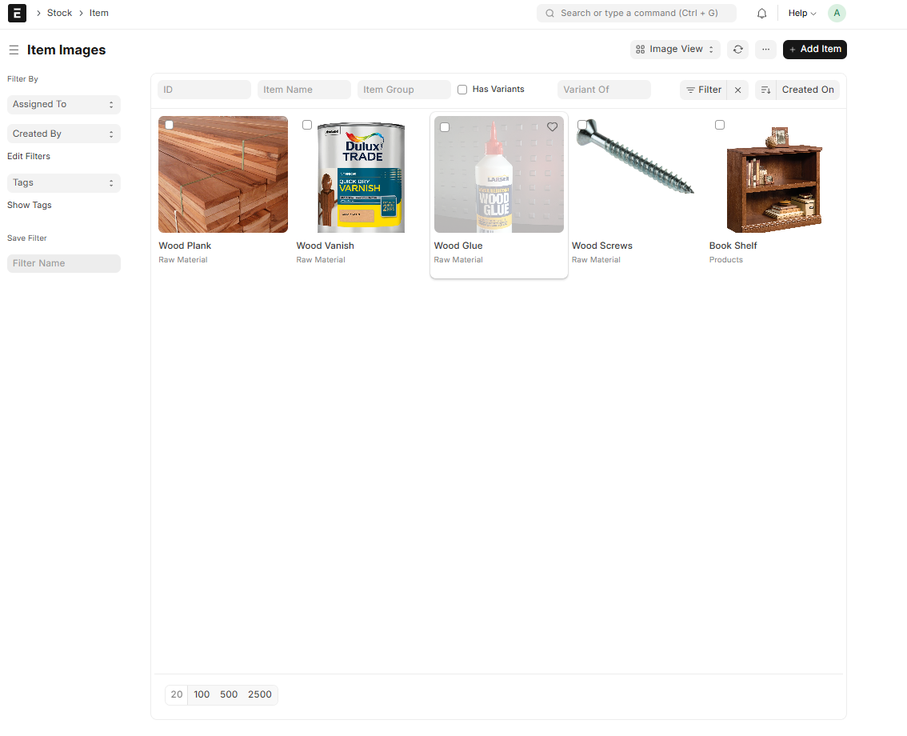
3. Listing All Raw Materials
Once all raw material items are created, you can view them together. This gives a clear picture of what's needed before production starts.
4. Creating the Bill of Materials (BOM)
The Bill of Materials is the recipe for your finished product. It lists all raw materials and their quantities required to produce one unit of the finished item. The BOM also defines operations (like cutting, assembling, polishing) and their sequence.
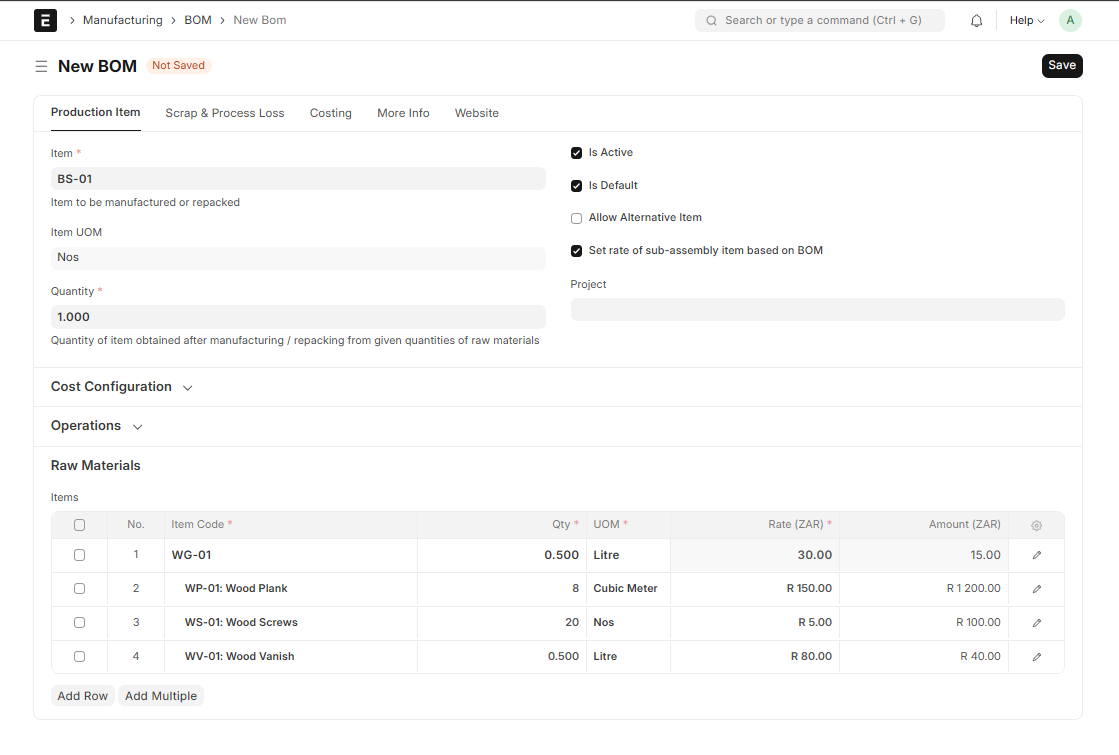
Once the BOM is created and submitted, you can proceed to produce a Work Order for this item.
5. Sales Order: The Trigger for Production
Manufacturing often starts with a customer order. When a Sales Order is created for the finished item, ERPNext shows the item details, pricing, and importantly, the stock availability indicator (a colored dot next to the item).
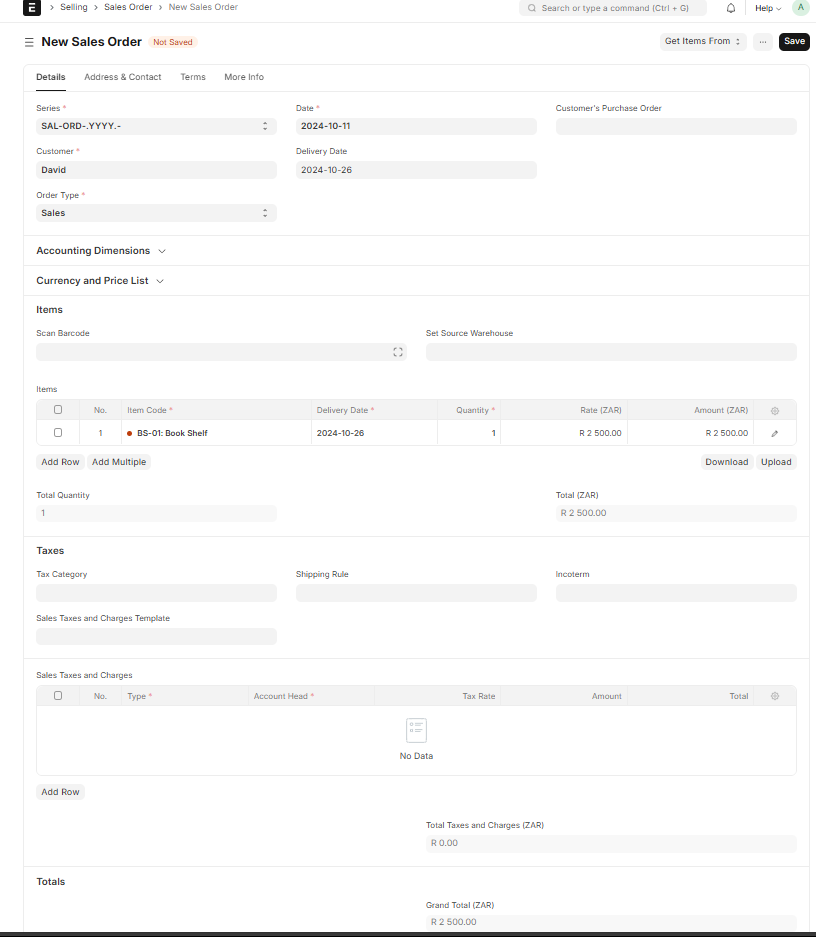
If the item is not in stock, the system allows you to create a Work Order directly from the Sales Order.
6. Creating a Work Order from Sales Order
Using the "Create" button on the Sales Order, select "Work Order". Most information will be auto-populated from the Sales Order and BOM. You only need to:
- Specify the quantity to manufacture
- Add operations and their expected times (if not already in BOM)
- Ensure raw materials are in the correct warehouse – otherwise, a material transfer will be required
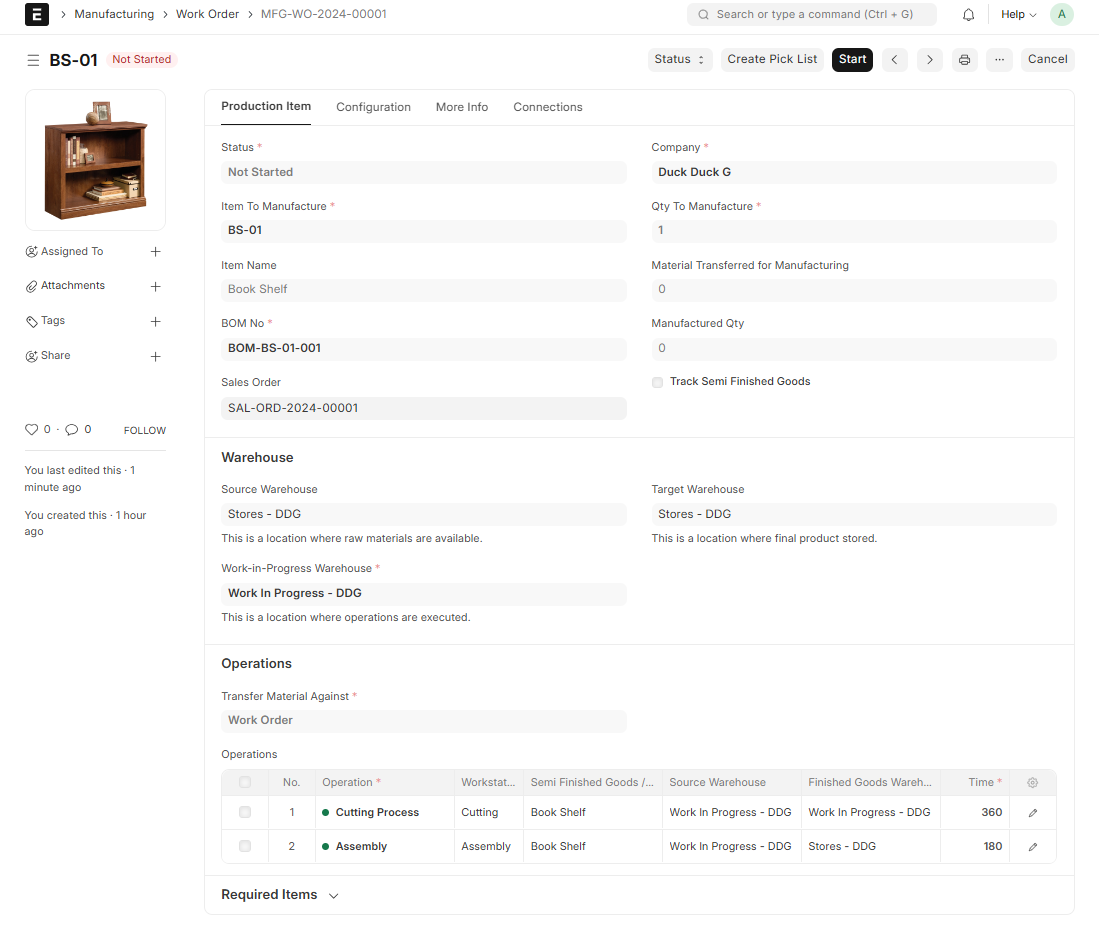
7. Starting the Manufacturing Process
Once the Work Order is submitted, you'll see options to begin manufacturing. The first step is to move raw materials to the work-in-progress (WIP) warehouse using a Stock Entry.
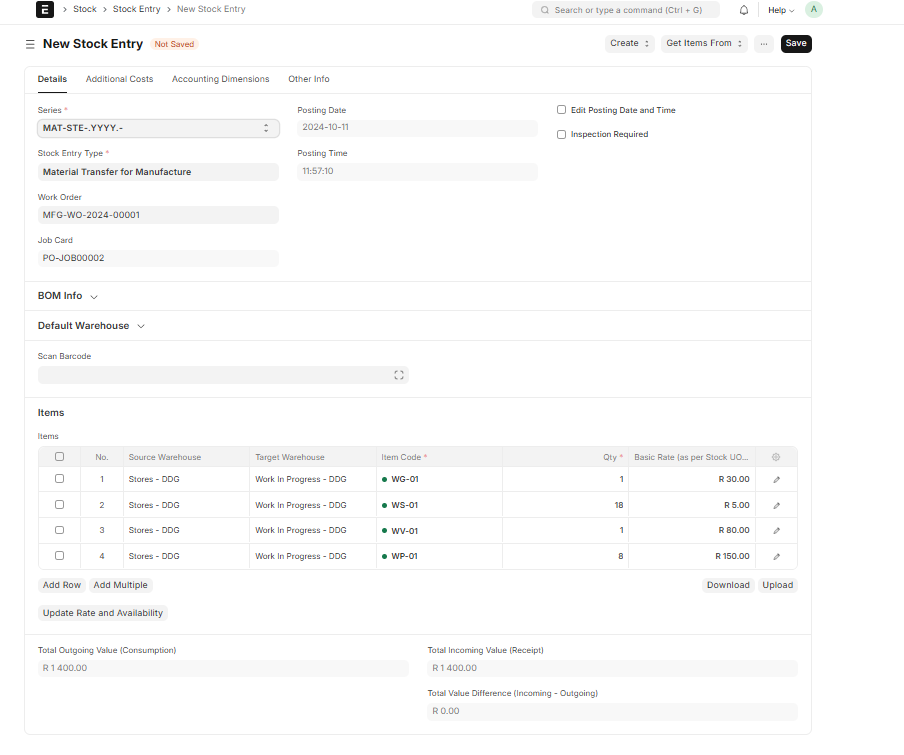
7.1 Stock Entry for Material Transfer
The system generates a Stock Entry showing the exact quantities of raw materials required. Review it, ensure all items are available, then save and submit.
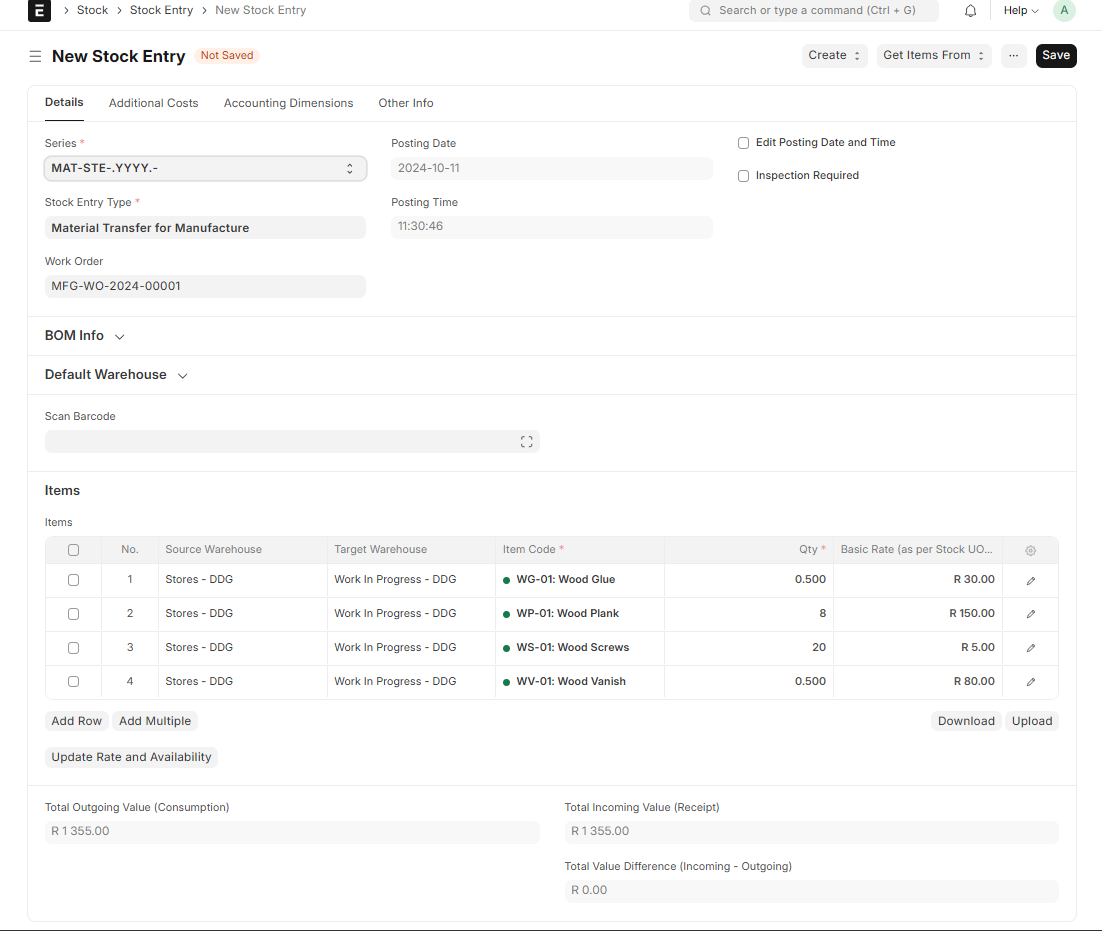
If any raw materials are missing, you can create a Material Request from this screen before submitting the Stock Entry.
8. Job Cards: Assigning Work to Workstations
After material transfer, ERPNext creates Job Cards for each operation defined in the Work Order. Each Job Card is assigned to a specific workstation on the manufacturing floor. The Job Card contains:
- Operation details
- Quantity to produce
- Allowed time (hourly rate and total time)
- Raw materials allocated to this operation
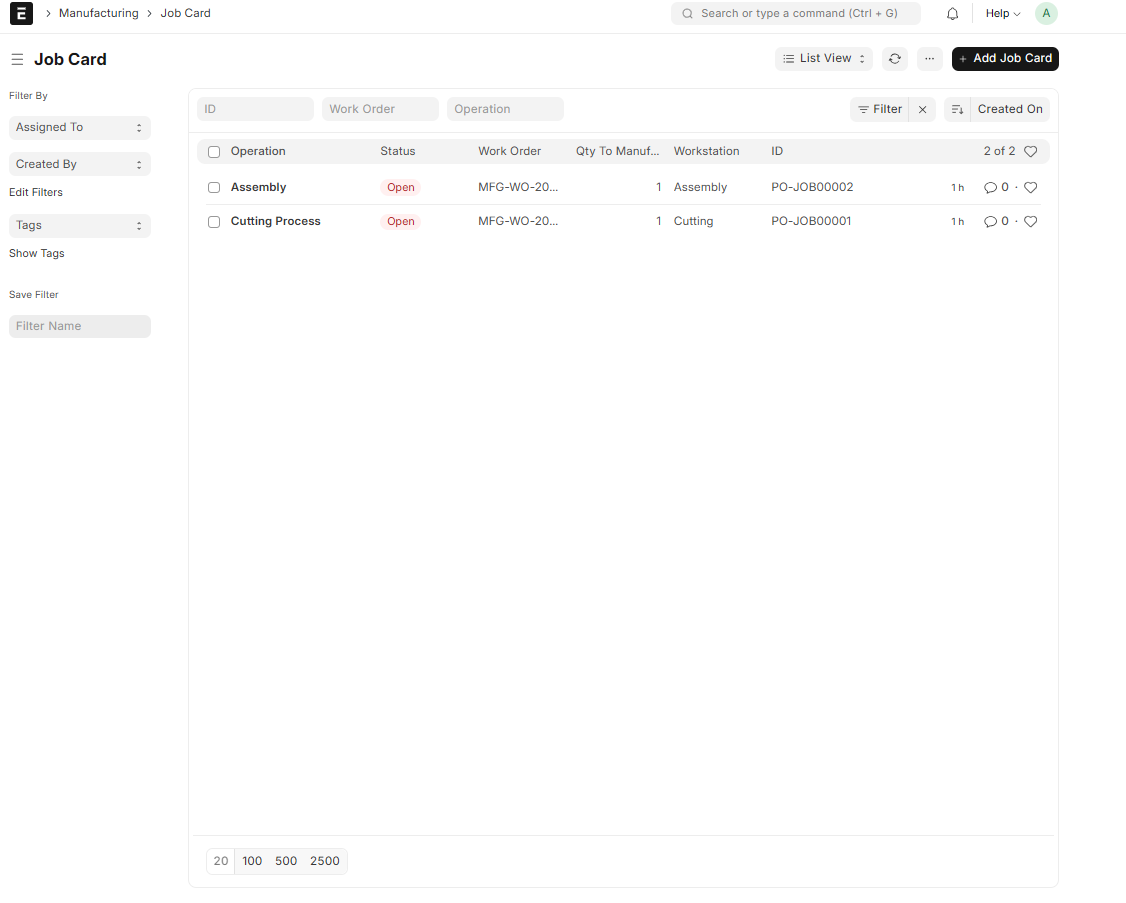
You can print the Job Card for the floor person, then click "Start Job" to begin.
9. Recording Time and Completing a Job
When a worker starts a job, a timer begins. They can record the actual time taken and the quantity completed. For partial completions, you can specify how much was done.
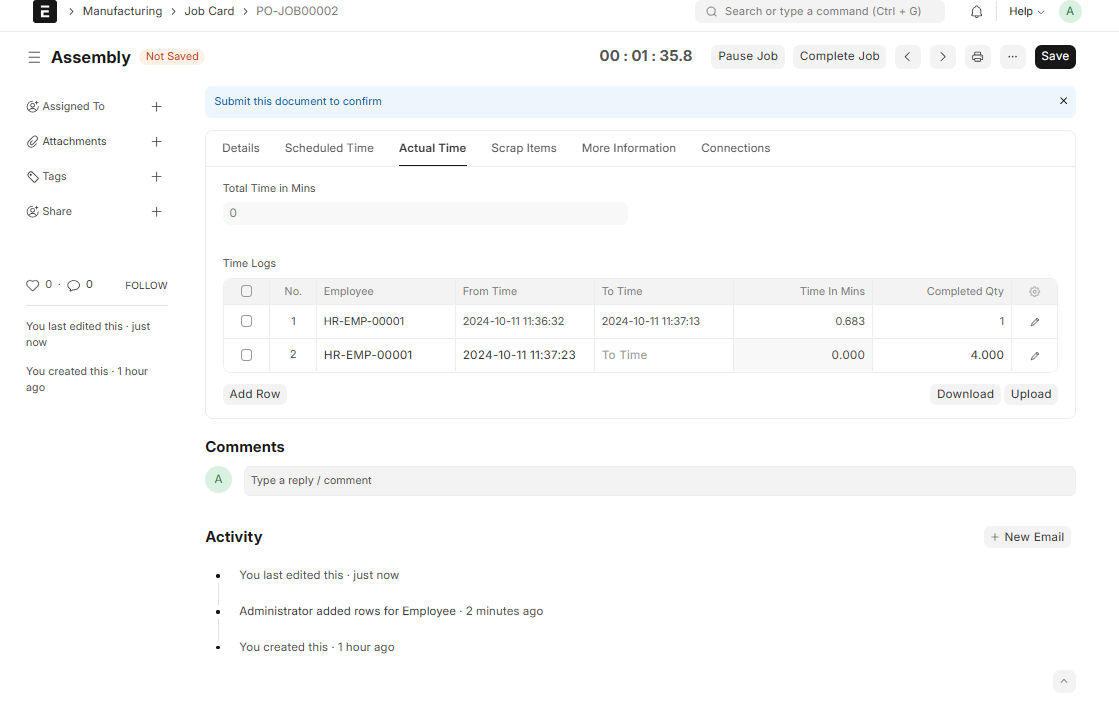
Once the operation is finished, click "Complete" and submit the Job Card. This will mark that operation as done.
10. Transferring Finished Goods to Store
After all Job Cards are completed, the Work Order status changes to "In Process". You can now transfer the finished goods to the finished goods warehouse.
From the Work Order, click the "Finished" button. This creates a Stock Entry to move the manufactured quantity from WIP to the store warehouse.
Review and submit this Stock Entry. Now the finished goods are available for sale.
11. Delivery Note and Sales Invoice
Back on the Sales Order, you can now create a Delivery Note. Since the item is now in stock, the Delivery Note will show available quantity.
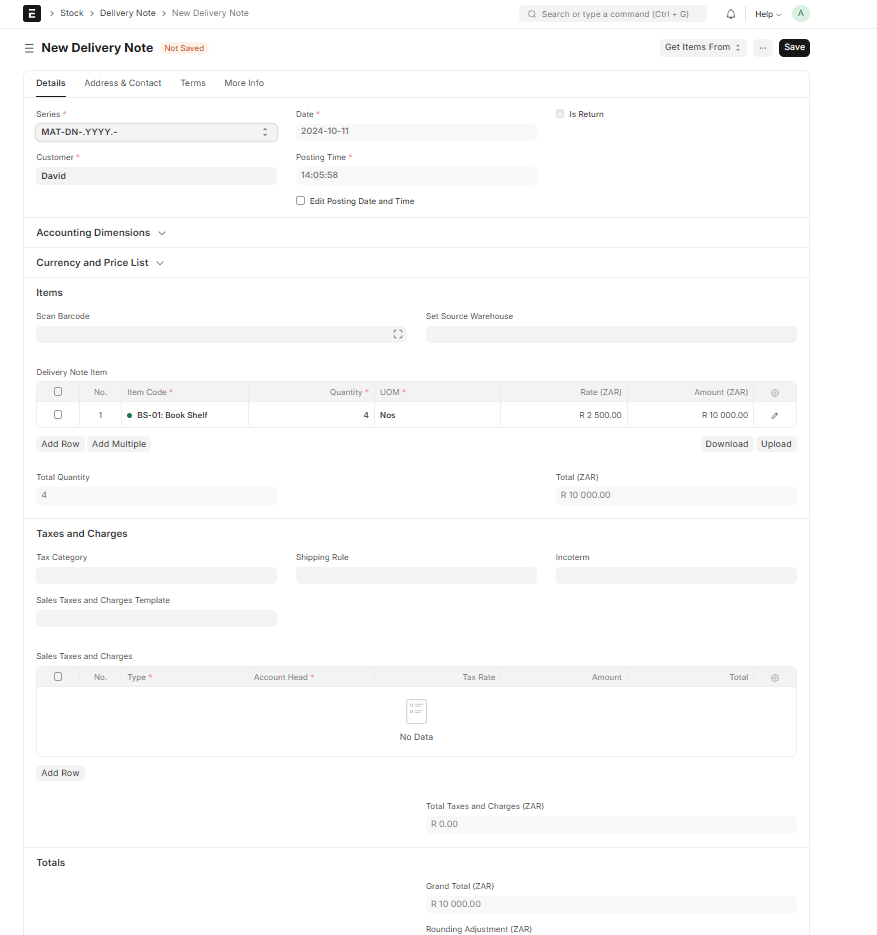
Save and submit the Delivery Note. Then, from the Sales Order, create a Sales Invoice to bill the customer.
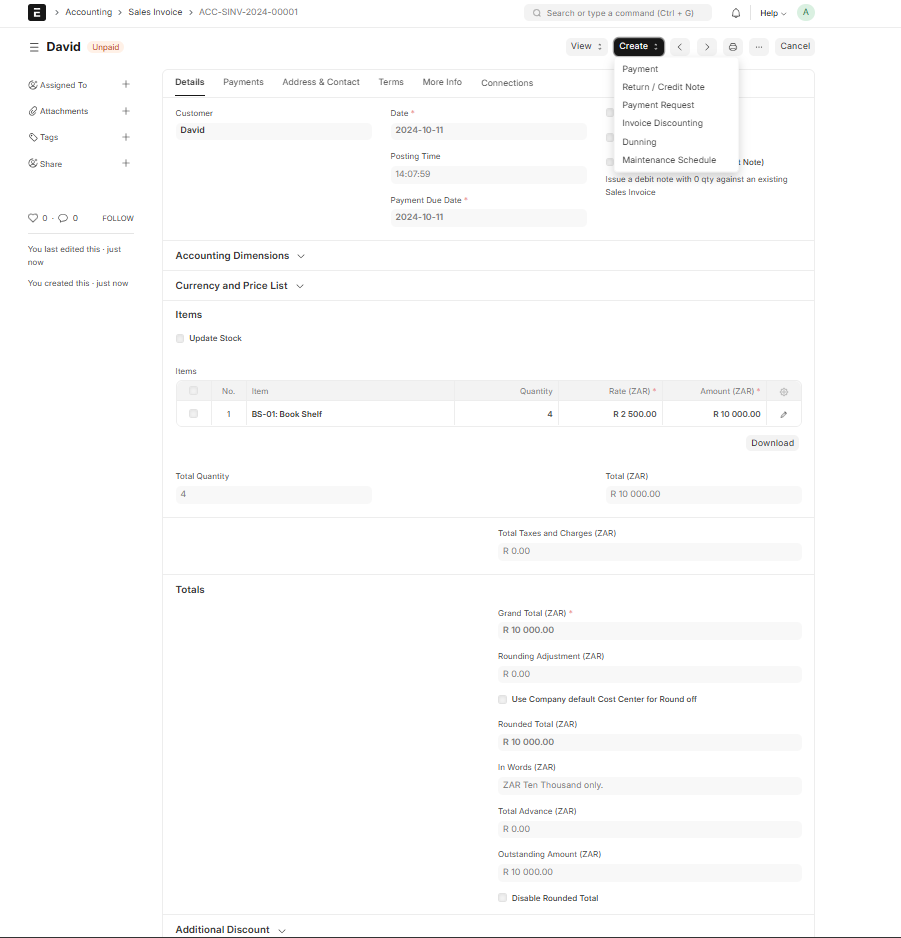
Submit the invoice once all details are correct.
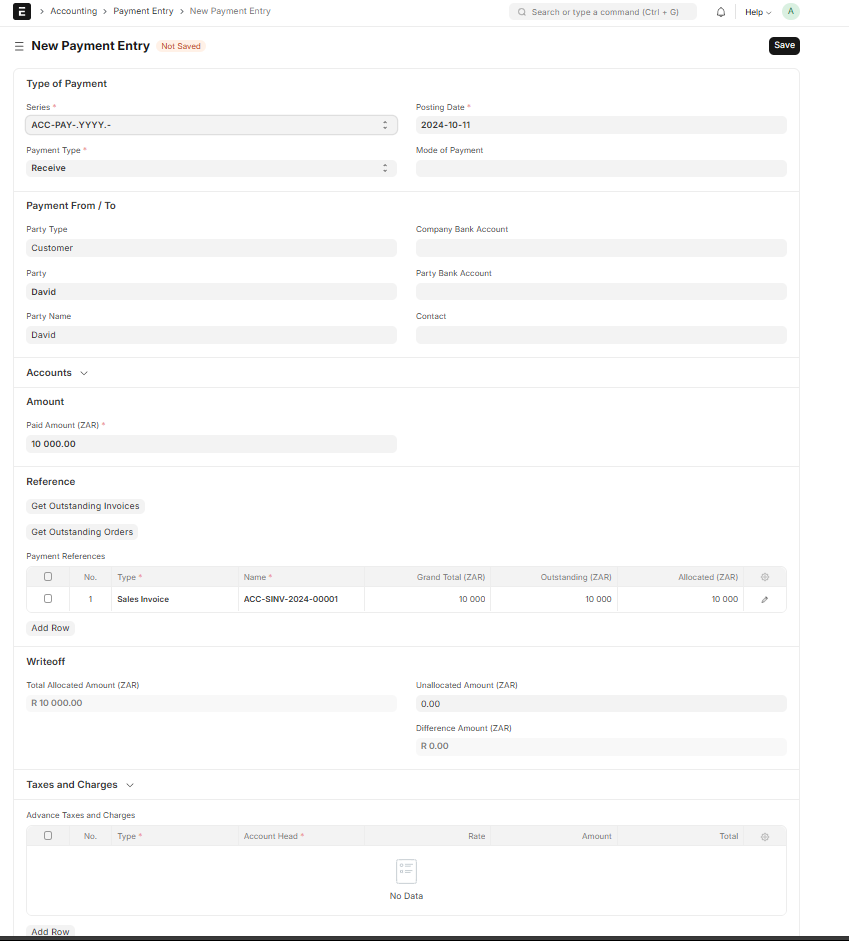
12. Payment and Accounting
After submitting the Sales Invoice, you can record a Payment Entry. Once the payment is submitted, the Sales Order is marked as "Completed".
The system automatically updates the General Ledger with all transactions: material transfers, finished goods receipts, delivery, invoicing, and payment.
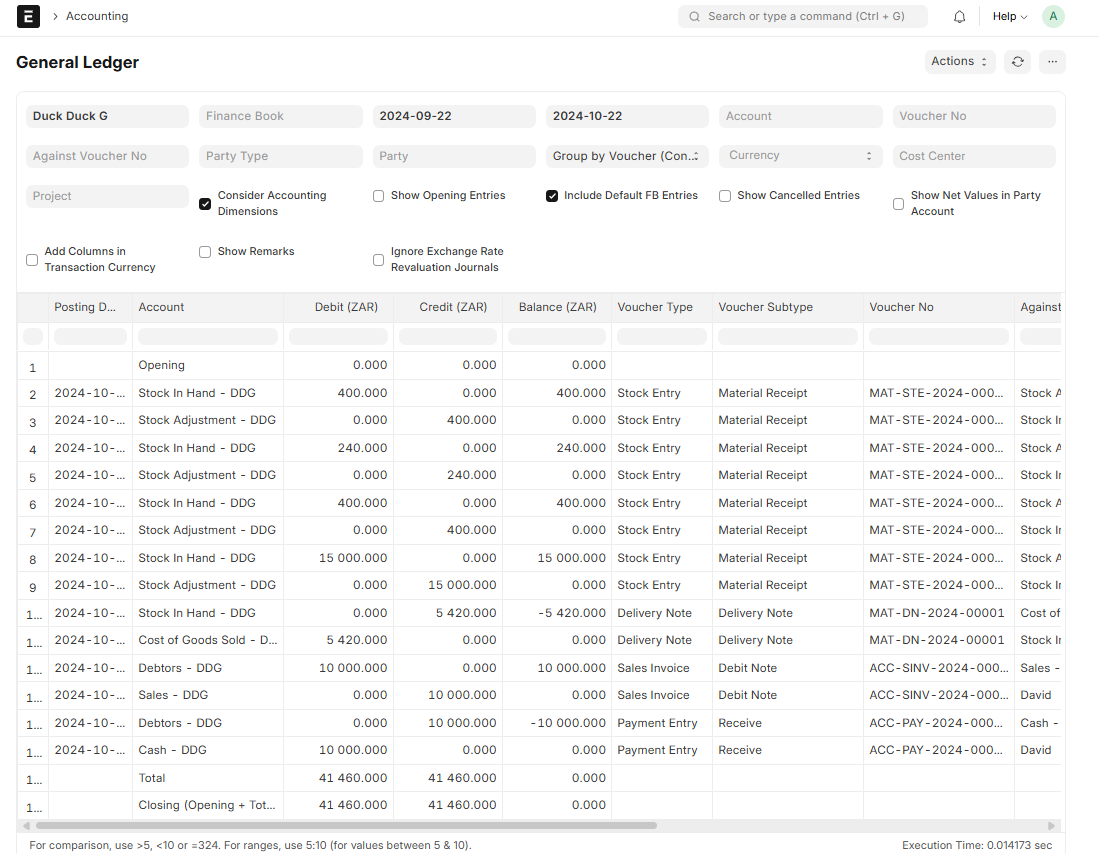
You can print the General Ledger for audit or review. It provides a complete financial trail from raw material purchase to customer payment.
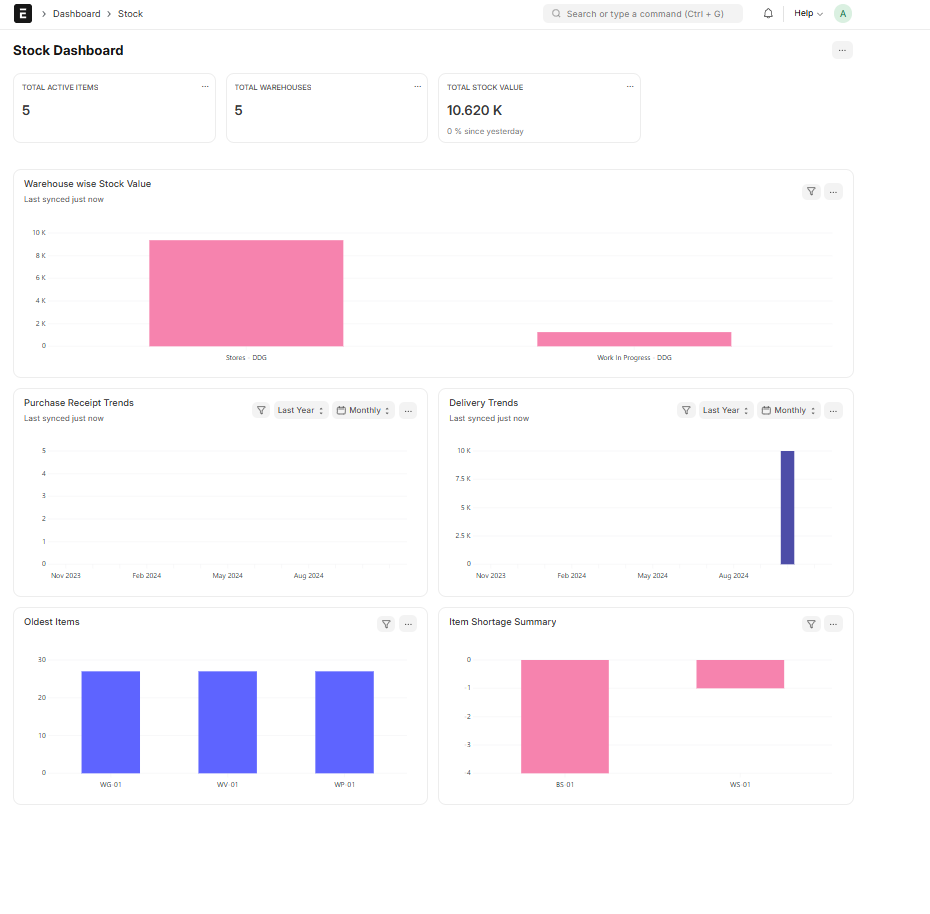
13. Manufacturing Dashboard and Reporting
ERPNext includes dedicated dashboards for manufacturing and selling. These give you real-time insights into:
- Work Order statuses
- Job Card progress
- Stock levels of raw materials and finished goods
- Profitability per Work Order
Conclusion
Manufacturing in ERPNext is a complete, integrated process. From creating raw material items to delivering finished products and recording payments, every step is connected. The use of BOMs, Work Orders, Job Cards, and Stock Entries ensures full traceability and control over your production floor.
Whether you're producing one item or thousands, ERPNext scales with you. The best part? All accounting entries are automated, so your General Ledger always reflects the true cost and revenue of your manufacturing operations.
No comments yet. Login to start a new discussion Start a new discussion